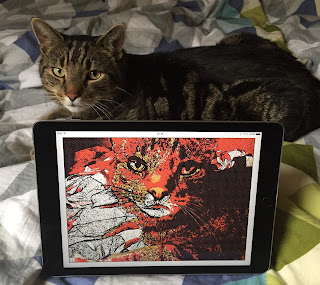
Here's a fun little demo project that you may find useful as a starting point for your own work: a Swift app for iOS that applies a Core Image filter (I've used a CIComicEffect - one of the new filters available in iOS 9) and displays the resulting image on screen.
To kick off this work, I turned to Camera Capture on iOS from objc.io for the basics. My code omits some of the authorisation and error checking and just contains the bare bones to get up and running. If you want to create a production app, I suggest you head over to that article.
In a nutshell, the app creates a capture session, an input (the camera) and an output. The output is captured, via AVCaptureVideoDataOutputSampleBufferDelegate, and that captured data is fed into a Core Image filter.
The steps, therefore, are:
Create the AVCaptureSession which coordinates the flow of data from the input to the output:
let captureSession = AVCaptureSession()
captureSession.sessionPreset = AVCaptureSessionPresetPhoto
Create an AVCaptureDevice which represents a physical capture device, in this case a camera:
let backCamera = AVCaptureDevice.defaultDeviceWithMediaType(AVMediaTypeVideo)
Create a concrete implementation of the device and attach it to the session. In Swift 2, instantiating AVCaptureDeviceInput can throw an error, so we need to catch that:
do
{
let input = tryAVCaptureDeviceInput(device: backCamera)
captureSession.addInput(input)
}
catch
{
print("can't access camera")
return
}
Now, here's a little 'gotcha': although we don't actually use an AVCaptureVideoPreviewLayer but it's required to get the sample delegate working, so we create one of those:
// although we don't use this, it's required to get captureOutput invoked
let previewLayer = AVCaptureVideoPreviewLayer(session: captureSession)
view.layer.addSublayer(previewLayer)
Next, we create a video output, AVCaptureVideoDataOutput which we'll use to access the video feed:
let videoOutput = AVCaptureVideoDataOutput()
Ensuring that self implements AVCaptureVideoDataOutputSampleBufferDelegate, we can set the sample buffer delegate on the video output:
videoOutput.setSampleBufferDelegate(self,
queue: dispatch_queue_create("sample buffer delegate", DISPATCH_QUEUE_SERIAL))
The video output is then attached to the capture session:
captureSession.addOutput(videoOutput)
...and, finally, we start the capture session:
captureSession.startRunning()
Because we've set the delegate, captureOutput will be invoked with each frame capture. captureOutput is passed a sample buffer of type CMSampleBuffer and it just takes two lines of code to convert that data to a CIImage for Core Image to handle:
let pixelBuffer = CMSampleBufferGetImageBuffer(sampleBuffer)
let cameraImage = CIImage(CVPixelBuffer: pixelBuffer!)
...and that image data is passed to our Comic Book effect which, in turn, is used to populate an image view:
let comicEffect = CIFilter(name: "CIComicEffect")
comicEffect!.setValue(cameraImage, forKey: kCIInputImageKey)
let filteredImage = UIImage(CIImage: comicEffect!.valueForKey(kCIOutputImageKey) as! CIImage!)
dispatch_async(dispatch_get_main_queue())
{
self.imageView.image = filteredImage
}
Easy!
All of this code is available at my GitHub repository here.