Quantcast
Channel: FlexMonkey
Viewing all 257 articles
Browse latest View live

Easy Image Histograms in Swift with Shinpuru Image

$
0
0
Following on from my recent post on Shinpuru Image, my Swift syntactic sugar for Core Image and vImage filters, here's a new addition: SIHistogramCalculation().

SIHistogramCalculation() returns a tuple containing four arrays of 256 unsigned integers which can be used to create an image histogram representing the tonal distribution of an image. It's based on the vImage vImageHistogramCalculation_ARGB8888() function and is implemented as easily as:

        let histogram = UIImage(named: "glass.jpg")?.SIHistogramCalculation()

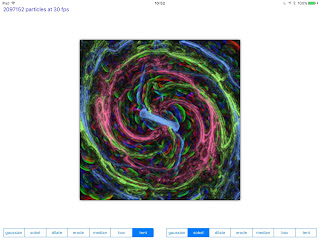
I've created a demonstration class, Histogram, which uses Daniel Cohen Gindi's ios-charts project to display a nice looking histogram chart. The demo uses three filters, SIWhitePointAdjust(), SIColorControls() and SIGammaAdjust(), which are chained together with the output image populating a UIImageView and acting as the source to a SIHistogramCalculator():

    let targetColor = UIColor(red: CGFloat(redSlider.value),
        green: CGFloat(greenSlider.value),
        blue: CGFloat(blueSlider.value),
        alpha: CGFloat(1.0))
    
    let image = UIImage(named: "glass.jpg")?
        .SIWhitePointAdjust(color: targetColor)
        .SIColorControls(saturation: saturationSlider.value, brightness: brightnessSlider.value, contrast: contrastSlider.value)
        .SIGammaAdjust(power: gammaSlider.value)
    
    let histogram = image?.SIHistogramCalculation()
    

    imageView.image = image

I then iterate over the histogram object building three arrays of ChartDataEntry:

    var redChartData = [ChartDataEntry](count: 256, repeatedValue: ChartDataEntry())
    var greenChartData = [ChartDataEntry](count: 256, repeatedValue: ChartDataEntry())

    var blueChartData = [ChartDataEntry](count: 256, repeatedValue: ChartDataEntry())

    for i: Intin0 ... 255
    {
        redChartData[i] = ( ChartDataEntry(value: Float(histogram!.red[i]), xIndex: i) )
        greenChartData[i] = ( ChartDataEntry(value: Float(histogram!.green[i]), xIndex: i) )
        blueChartData[i] = ( ChartDataEntry(value: Float(histogram!.blue[i]), xIndex: i) )

    }

...which in turn are used to create LineChartDataSet instances which are passed to the LineChartView's data:

    let redChartDataSet = LineChartDataSet(yVals: redChartData, label: "red")
    let greenChartDataSet = LineChartDataSet(yVals: greenChartData, label: "green")

    let blueChartDataSet = LineChartDataSet(yVals: blueChartData, label: "blue")

    let lineChartData = LineChartData(xVals: foo, dataSets: [redChartDataSet, greenChartDataSet, blueChartDataSet])
    
    chart.data = lineChartData

...and that's all there is to the implementation! All the boiler plate code of wrestling with vImage's strange syntax and wrestling with UnsafeMutablePointers is hidden away inside Shinpuru Image, leaving you to create beautiful histograms!

One caveat - these filters are horribly slow in the iOS simulator, but this demo runs beautifully smoothly on my iPad Air 2. My plan is to add easy asynchronous support to Shinpuru Image to make running filters in the background really easy to add. 

Shinpuru Image is open source and the project lives in my GitHub repository here

Fast Core Image Filter Chaining in Swift with Shinpuru Image

$
0
0
The first iteration of Shinpuru Image, was great to simplify the implementation of Core Image and vImage filters but was a little suboptimal when chaining filters together. This is because each invocation of a filter converted the input from UIImage to a CIImage and, after filtering, converted the filter output back to CIImage

The better approach would be to keep the inputs and outputs of each step of the chain as CIImage and only do the conversion to UIImage at the end of the chain when Core Image accumulates all the filters and does the image processing work in one step.

To support that technique, I've extended Shinpuru Image with fast filtering support. The first part of this is to use a slightly different CIContext which is created from an EAGL context. This is Apple's recommended approach for realtime performance and looks like this:

    staticlet ciContextFast = CIContext(EAGLContext: EAGLContext(API: EAGLRenderingAPI.OpenGLES2), options: [kCIContextWorkingColorSpace: NSNull()])

For each of my existing filter functions which were extensions to UIImage, I've created a duplicate version which is an extension to CIImage, for example:

    func SIWhitePointAdjust(#color: UIColor) -> CIImage
    {
        let inputColor = KeyValuePair(key: "inputColor", value: CIColor(color: color)!)
        
        let filterName = "CIWhitePointAdjust"
        
        returnShinpuruCoreImageHelper.applyFilter(self, filterName: filterName, keyValuePairs: [inputColor])

    }

The CIImage version of applyFilter() doesn't do any conversion, it simply sets the value on the filter using the supplied key-value pairs:

    staticfunc applyFilter(image: CIImage, filterName: String, keyValuePairs: [KeyValuePair]) -> CIImage
    {
        let ciFilter = CIFilter(name: filterName)
        
        let inputImage = KeyValuePair(key: kCIInputImageKey, value: image)
        ciFilter.setValue(inputImage.value, forKey: inputImage.key)
        
        keyValuePairs.map({ ciFilter.setValue($0.value, forKey: $0.key) })
        
        return ciFilter.valueForKey(kCIOutputImageKey) as! CIImage

    }

At the end of the filter chain, to toUIImage() method does the final conversion to a UIImage:

    func toUIImage() -> UIImage
    {
        let filteredImageRef = ShinpuruCoreImageHelper.ciContextFast.createCGImage(self, fromRect: self.extent())
        let filteredImage = UIImage(CGImage: filteredImageRef)!
        
        return filteredImage

    }

The demo application's Histogram demo has been fleshed out to chain together five filters: SIWhitePointAdjust, SIColorControls, SIGammaAdjust, SIExposureAdjust and SIHueAdjust, and there's a toggle button to turn fast filtering on and off. 

The code for fast filtering is turned off is:

    image = UIImage(named: "tram.jpg")?
        .SIWhitePointAdjust(color: targetColor)
        .SIColorControls(saturation: saturationSlider.value, brightness: brightnessSlider.value, contrast: contrastSlider.value)
        .SIGammaAdjust(power: gammaSlider.value)
        .SIExposureAdjust(ev: exposureSlider.value)
        .SIHueAdjust(power: hueSlider.value)

..and for fast filtering is turned on is:

    image = SIFastChainableImage(image: UIImage(named: "tram.jpg"))
        .SIWhitePointAdjust(color: targetColor)
        .SIColorControls(saturation: saturationSlider.value, brightness: brightnessSlider.value, contrast: contrastSlider.value)
        .SIGammaAdjust(power: gammaSlider.value)
        .SIExposureAdjust(ev: exposureSlider.value)
        .SIHueAdjust(power: hueSlider.value)
        .toUIImage()

The speed difference is pretty impressive: with the 'regular' code each step takes around 0.055 seconds and with fast filtering, each step takes around 0.015 seconds.

Shinpuru Image is an open source project and available at my Git Hub repository here.

A First Look at UIStackView in Swift 2.0

$
0
0

Amongst the many exciting things here at WWDC (Metal for OS X, UI Debugging, Open Source Swift...) is the introduction of a new layout class for Swift, UIStackView. UIStackView is a great addition to UIKit which offers a really simple way to leverage Auto Layout by arranging its subviews in rows or columns.

It's a bittersweet addition for me, since my very own Shinpuru Layout components did pretty much the same. That said, UIStackView contains a lot more functionality and is undoubtedly more performant than my code. 

I've created a little Swift 2.0 application that demonstrates a few features of UIStackView: it dynamically sizes a handful of coloured boxes, changes layout directions based on orientation and allows the user to add or remove those boxes with a nice animation. To run this code, you'll need Xcode 7.

The application contains three UIStackView instances: mainStackView is always laid out vertically and contains stackView and a UISegmentedControl. stackView contains purple, red and blue boxes and subStackView which, in turn, contains grey, yellow and green boxes.

When the view is in landscape format (as above), stackView is laid out horizontally and subStackView is laid out vertically and when the view is rotated to portrait the opposite is true: stackView is laid out vertically and subStackView is laid out horizontally:


Toggling the items in the UISegmentedControls hides and shows the appropriate box.

Let's look at how I've implemented this.

First off, my three stack viewsare instantiated as UIStackViews:


    let mainStackView = UIStackView()
    let stackView = UIStackView()
    let subStackView = UIStackView()

...and, inside viewDidLoad() of my view controller, added to the view and each other. When adding a subview to be managed by a stack view, the method is addArrangedSubview():


    view.addSubview(mainStackView)
    mainStackView.addArrangedSubview(stackView)
    stackView.addArrangedSubview(subStackView)

Here, I also add the coloured boxes and segmented control to the relevant stack views. For example:


    stackView.addArrangedSubview(blueBox)
    subStackView.addArrangedSubview(grayBox)
    mainStackView.addArrangedSubview(segmentedControl)

I want to fill out the available space in the main stack view, but keep the intrinsic size of the UISegmentedControl, while with the other two stack views, I want to resize all their sub views so that all the available space is used. To do that, the distribution policy I use for mainStackView is Fill, but the the other two, it's FillEqually


    mainStackView.distribution = UIStackViewDistribution.Fill
    stackView.distribution = UIStackViewDistribution.FillEqually
    subStackView.distribution = UIStackViewDistribution.FillEqually

The main stack view is always laid out vertically, so I set its axis in viewDidLoad() too:


    mainStackView.axis = UILayoutConstraintAxis.Vertical

To "pin" my main stack view to the available size of the application, I override viewDidLayoutSubviews() and set its frame:


    let top = topLayoutGuide.length
    let bottom = bottomLayoutGuide.length
        

    mainStackView.frame = CGRect(x: 0, y: top, width: view.frame.width, height: view.frame.height - top - bottom).rectByInsetting(dx: 10, dy: 10)

...and it's also here that I examine the dimensions of the view.frame and, set the axis properties of the two other stack views depending on whether the view is portrait or landscape. This seems to happen in a background thread, so I've wrapped that code in a dispatch_async() on the main queue:


    dispatch_async(dispatch_get_main_queue())
    {
        ifself.view.frame.height> self.view.frame.width
        {
            self.stackView.axis = UILayoutConstraintAxis.Vertical
            self.subStackView.axis = UILayoutConstraintAxis.Horizontal
        }
        else
        {
            self.stackView.axis = UILayoutConstraintAxis.Horizontal
            self.subStackView.axis = UILayoutConstraintAxis.Vertical
        }
    }

To show and hide individual coloured boxes, I toggle their hidden property based on the selected segment index of the UISegmentedControl. The first three items in the segmented control refer to the boxes in stackView and the second three refer to the boxes in subStackView. Wrapping that toggling in an animateWithDuration() gives a nice animated transition:


    func segmentedControlChangeHandler()
    {
        let index = segmentedControl.selectedSegmentIndex
        
        let togglingView = index <= 3 ? stackView.arrangedSubviews[index] : subStackView.arrangedSubviews[index - 3]
        
        UIView.animateWithDuration(0.25){ togglingView.hidden = !togglingView.hidden }
    }

I did notice some issues when running this in debug build configuration, so be sure to use release. 

The code for this experiment lives in my GitHub repository here. Enjoy!

Of course, the big question is: does this code work OK with the new multitasking support for iPad Air 2? Yessiree bob cat tail! Check this out...

A First Look at Metal for OS X El Capitan

$
0
0

One of the other big announcements at WWDC was the introduction of Metal to the new version of OS X, El Capitan. Metal is a low level graphics API that offers awesome performance and its availability on desktop and laptop devices allows developers to use a common codebase across both classes of device.

I've been playing with Metal on iOS extensively - mainly experimenting with compute shaders for calculating particle systems and running cellular automata on the GPU. I've just been lucky enough to spend some time at WWDC with the Metal team and port my ParticleLab component from iOS to OS X. 

The Metal shader code hasn't changed at all and there are only a few small changes to the Swift host component, ParticleLab. These changes aren't platform specific, so once Xcode 7 reaches general availability, I'll be moving these changes to the main project.

The main change is that the component no longer extends CAMetalLayer, it's now a subclass of MTKView. I no longer use CADisplayLink to manage timing, I simply override the MTKView's drawRect() method and add my own step() method to that:

    overridefunc drawRect(dirtyRect: NSRect)
    {
        ifmetalReady
        {
            step()
        }

    }

The end result is a cross platform, high performance GPU based particle system.

Bear in mind, Xcode 7 and El Capitan are still in beta. The particle system does render slightly differently on different GPU targets (e.g. Intel vs. AMD) and I'm sure there's more speed to eek out of the OS X version, but I'm absolutely blown away with the ease with which we ported the code and the potential of what Metal will be able to do on OS X devices.

A million thanks to the Metal engineers in the lab at WWDC - their passion and enthusiasm to help me out was beyond the call of duty.

My OS X Metal Particles project is available at my GitHub repo here.

New Core Image Filters in iOS 9

$
0
0

WWDC 2015 saw some exciting news for fans of Core Image Filters. Not only are lots of filters, such as blur and convolution, now powered by MetalPerformanceShaders giving some amazing performance improvements, but Apple have implemented parity for available image filters across iOS and OS X. 

This gives iOS 43 new image filters that I can't wait to add to my own Nodality application. It also means that code and functionality can be shared across both classes of device and I've already stated thinking about a desktop version of Nodality.

So, what are the new filters? Well, CIFilter has the class method filterNamesInCategories() which returns an array of all available filters. A quick diff between iOS 8 and 9 returns the following:


  • CIAreaAverage - Returns a single-pixel image that contains the average color for the region of interest.
  • CIAreaMaximum - Returns a single-pixel image that contains the maximum color components for the region of interest.
  • CIAreaMaximumAlpha - Returns a single-pixel image that contains the color vector with the maximum alpha value for the region of interest.
  • CIAreaMinimum - Returns a single-pixel image that contains the minimum color components for the region of interest.
  • CIAreaMinimumAlpha - Returns a single-pixel image that contains the color vector with the minimum alpha value for the region of interest.
  • CIBoxBlur - Blurs an image using a box-shaped convolution kernel.
  • CICircularWrap - Wraps an image around a transparent circle.
  • CICMYKHalftone - Creates a color, halftoned rendition of the source image, using cyan, magenta, yellow, and black inks over a white page.
  • CIColumnAverage - Returns a 1-pixel high image that contains the average color for each scan column.
  • CIComicEffect - Simulates a comic book drawing by outlining edges and applying a color halftone effect.
  • CIConvolution7X7 - Modifies pixel values by performing a 7x7 matrix convolution.
  • CICrystallize - Creates polygon-shaped color blocks by aggregating source pixel-color values.
  • CIDepthOfField - Simulates a depth of field effect.
  • CIDiscBlur - Blurs an image using a disc-shaped convolution kernel.
  • CIDisplacementDistortion - Applies the grayscale values of the second image to the first image.
  • CIDroste - Recursively draws a portion of an image in imitation of an M. C. Escher drawing.
  • CIEdges - Finds all edges in an image and displays them in color.
  • CIEdgeWork - Produces a stylized black-and-white rendition of an image that looks similar to a woodblock cutout.
  • CIGlassLozenge - Creates a lozenge-shaped lens and distorts the portion of the image over which the lens is placed.
  • CIHeightFieldFromMask - Produces a continuous three-dimensional, loft-shaped height field from a grayscale mask.
  • CIHexagonalPixellate - Maps an image to colored hexagons whose color is defined by the replaced pixels.
  • CIKaleidoscope - Produces a kaleidoscopic image from a source image by applying 12-way symmetry.
  • CILenticularHaloGenerator - Simulates a lens flare.
  • CILineOverlay - Creates a sketch that outlines the edges of an image in black.
  • CIMedianFilter - Computes the median value for a group of neighboring pixels and replaces each pixel value with the median.
  • CINoiseReduction - Reduces noise using a threshold value to define what is considered noise.
  • CIOpTile - Segments an image, applying any specified scaling and rotation, and then assembles the image again to give an op art appearance.
  • CIPageCurlTransition - Transitions from one image to another by simulating a curling page, revealing the new image as the page curls.
  • CIPageCurlWithShadowTransition - Transitions from one image to another by simulating a curling page, revealing the new image as the page curls.
  • CIParallelogramTile - Warps an image by reflecting it in a parallelogram, and then tiles the result.
  • CIPassThroughColor
  • CIPassThroughGeom
  • CIPDF417BarcodeGenerator
  • CIPointillize - Renders the source image in a pointillistic style.
  • CIRippleTransition - Transitions from one image to another by creating a circular wave that expands from the center point, revealing the new image in the wake of the wave.
  • CIRowAverage - Returns a 1-pixel high image that contains the average color for each scan row.
  • CIShadedMaterial - Produces a shaded image from a height field.
  • CISpotColor - Replaces one or more color ranges with spot colors.
  • CISpotLight - Applies a directional spotlight effect to an image.
  • CIStretchCrop - Distorts an image by stretching and or cropping it to fit a target size.
  • CISunbeamsGenerator - Generates a sun effect.
  • CITorusLensDistortion - Creates a torus-shaped lens and distorts the portion of the image over which the lens is placed.
  • CITriangleTile - Maps a triangular portion of image to a triangular area and then tiles the result.


For more information on each filter, visit Apple's Core Image Filter Reference.

New in iOS 9: Filtering SceneKit Nodes with Core Image Filters

$
0
0

Another exciting announcement at WWDC 2015 was a new property on SCNNode: filters which is an optional array of CIFilter instances.

By simply populating this array with a filter or filters, the node and its child nodes are filtered accordingly. This gives game developers, for example, a great way of stylising their 3D scenes with a halftone or pixellated look with next to no effort.

I've taken my old Scene Kit material editor project and added a segmented control that allows the user to add Core Image filters. The options are CIDroste (above) which imitates an Escher drawing, CICMYKHalftone which gives a four colour halftone:


...and CIPixellate which makes the image look blocky - great for those hipster 8 bit games:


The implementation is pretty simple. I have an extended segmented control that returns a value of type optional CIFilter:

    var value: CIFilter?
    {
        let returnFilter: CIFilter?
        
        switchsegmentedControl.selectedSegmentIndex
        {
        case0:
            returnFilter = CIFilter(name: "CIDroste")!
        case1:
            returnFilter = CIFilter(name: "CICMYKHalftone", withInputParameters: ["inputWidth": 20])!
        case2:
            returnFilter = CIFilter(name: "CIPixellate", withInputParameters: [kCIInputScaleKey: 30])!
        default:
            returnFilter = nil
        }
        
        return returnFilter
    }

...and my Scene Kit widget viewer uses that to populate its sphere node's filter array:

    var filter: CIFilter?
    {
        didSet
        {
            iflet filter = filter
            {
                sphereNode.filters = [filter]
            }
            else
            {
                sphereNode.filters = nil
            }
        }
    }


Addendum

Of course, as any any fule kno, the filters property was added to SCNNode in iOS 8. What's changed in iOS 9 is that filters is now properly typed to CIFilter. To remedy this schoolboy error, I've reengineered the layout code to use UIStackView. What's more, the layout is adaptive, so that in portrait it looks like:


....and in landscape, it looks like:


Cheers!

A Marking Menu Component for iOS in Swift

$
0
0

My first exposure to marking menus was using Alias|Wavefront software for 3D modelling and animation many moons ago. Marking menus are an advanced form of radial menus whereby the user performs a continuous gesture to navigate through and select items from a hierarchical menu. After some use, the gesture itself becomes synonymous with a menu selection.

Alias|Wavefront's software has now evolved into Autodesk's Maya where marking menus are still used throughout the application. 

As iOS evolves into an operating system suited to richer applications for content creation and with rumours of a larger iPad continuing to rumble, I'm thinking more and more about more advanced user interface solutions. So, this got me wondering, if marking menus are a great solution for high-end desktop software, could they be just as good for iOS apps? 

Turns out, they work really well - at least for iPad.

I've spent some time creating FMMarkingMenu (FM for Flex Monkey) - an easy to implement marking menu component for iOS. FMMarkingMenu is an open source project written in Swift and comes bundled with a demo iPad app (above). The app allows the user to navigate through some Core Image filter categories and select a filter which is applied to a background image. 

The implementation is super easy. First of all, I created my menu structure. This is an array of FMMarkingMenuItem instances. Each instance has a label and, optionally, an array of sub items. For example, to create a menu with a top level item labelled No Filter and a sub-menu labelled Blur & Sharpen, the menu structure would look like:

    let noFilter = FMMarkingMenuItem(label: "No Filter")
    
    let blur = FMMarkingMenuItem(label: "Blur & Sharpen", subItems:[FMMarkingMenuItem(label: "CIGaussianBlur"), FMMarkingMenuItem(label: "CISharpenLuminance"), FMMarkingMenuItem(label: "CIUnsharpMask")])

    let markingMenuItems = [blur, noFilter]

Then, create an instance of FMMarkingMenu:

    var markingMenu: FMMarkingMenu!

...and, typically in viewDidLoad(), instantiate the instance with references to the target view controller, view and the menu structure:

    let markingMenuItems = [blur, colorEffect, distort, photoEffect, halftone, styleize, noFilter, deepMenu]
        

    markingMenu = FMMarkingMenu(viewController: self, view: view, markingMenuItems: markingMenuItems)

To react to changes, FMMarkingMenu has a delegate protocol, FMMarkingMenuDelegate which contains one function:

    func FMMarkingMenuItemSelected(markingMenu: FMMarkingMenu, markingMenuItem: FMMarkingMenuItem)

This is invoked whenever the user marks an executable menu item (i.e. one with no sub-items). In my demo application, the view controller is the delegate and its implementation of this method looks like this:

    func FMMarkingMenuItemSelected(markingMenu: FMMarkingMenu, markingMenuItem: FMMarkingMenuItem)
    {
        let filters = (CIFilter.filterNamesInCategories(nil) ?? [AnyObject]()).filter({ $0 as! String ==  markingMenuItem.label})
        
        if filters.count != 0
        {
            imageView.image = applyFilter(photo, filterName: markingMenuItem.label)
        }
        else
        {
            imageView.image = photo
        }
        
        currentFilterLabel.text = markingMenuItem.label
        currentFilterLabel.frame = CGRect(x: 5,
            y: view.frame.height - currentFilterLabel.intrinsicContentSize().height - 5,
            width: currentFilterLabel.intrinsicContentSize().width,
            height: currentFilterLabel.intrinsicContentSize().height)

    }

That's all there is to it. FMMarkingMenu attaches a gesture recogniser to the view that it's passed in its constructor and whenever the user touches that view, the menu pops up. 

The Swift 1.2 source code for FMMarkingMenu along with the demo app and references to articles about marking menus is available at my GitHub repository here.

OS X El Capitan & iOS 9: Cross Platform Metal!

$
0
0

I finally bit the bullet and installed iOS 9 Beta 2 on my iPad Air 2. This has allowed me to extend my OS X Metal Particles project with a new target: an iOS device!

The Swift ParticleLab class and the Metal shader code are shared between both targets - true cross platform coding!

Both my iPad Air 2 and my Macbook Pro (3 GHz Intel Core i7) manage about 30fps with four million particles on a 1024 x 768 texture - so performance is pretty much the across both devices. This may well changes as both iOS 9 and OS X 10.11 evolve - it will be interesting to see how the two classes of device evolve over the next few months.

After first installing iOS 9, I was unable to launch any Metal apps on my iPad with Xcode returning:

failed assertion _interposeHandle != NULL at /BuildRoot/Library/Caches/com.apple.xbs/Sources/Metal/Metal-54.7/Framework/MTLDevice.mm:110 MTLInitializeInterpose

...this was rather worrying and I even created a Radar to report it. Luckily it was resolved by rebooting both my iPad and MBP - phew!

The new source code, which works under Xcode 7 Beta 2, is available at my GitHub repo here. I have heard the results are a bit ropey with some graphics chipsets - I'd love to hear your results.


A First Look at Metal Performance Shaders in iOS 9

$
0
0

One of my favourite new iOS 9 features released at this year's WWDC is the new Metal Performance Shaders (MPS) framework. MPS were explained by Anna Tikhonova in the second half of What's New in Metal, Part 2, in a nutshell, they are a framework of highly optimised data parallel algorithms for common image processing tasks such as convolution (e.g. blurs and edge detection), resampling (e.g. scaling) and morphology (e.g. dilate and erode). The feature set isn't a million miles away from Accelerate's vImage filters, but running on the GPU rather than the CPU's vector processor.

Apple have gone to extraordinary lengths to get the best performance from the filters. For example, there are several different ways to implement a Gaussian blur each with different start-up costs and overheads and each may give better performance depending on the input image, parameters, thread configuration, etc.

To cater for this, the MPSImageGaussianBlur filter actually contains 821 different Gaussian blur implementations and MPS selects the best one for the current state of the shader and the environment. Whereas a naive implementation of a Gaussian blur may struggle along at 3fps with a 20 pixel sigma, the MPS version can easily manage 60fps with a 60 pixel sigma and, in my experiments, is as fast or sometime fasters than simpler blurs such as box or tent.

MPS are really easy to implement in your own code. Let's say we want to add a Gaussian blur to an MTKView. First off, we need our device and, with Swift 2.0, we can use the guard statement:


    guardlet device = MTLCreateSystemDefaultDevice() else
    {            
        return
    }

    self.device = device

Then we instantiate a MPS Gaussian blur:


    let blur = MPSImageGaussianBlur(device: device, sigma: 3)

Finally, after ending the encoding of an existing command encoder, but before presenting our drawable, we insert the blur's encodeToCommandBuffer() method:


    commandEncoder.setTexture(texture, atIndex: 0);
    
    commandEncoder.dispatchThreadgroups(threadgroupsPerGrid, threadsPerThreadgroup: threadsPerThreadgroup)
    
    commandEncoder.endEncoding()

    blur.encodeToCommandBuffer(commandBuffer, sourceTexture: texture  destinationTexture: drawable.texture)

    commandBuffer.presentDrawable(drawable)
    

    commandBuffer.commit()

...and, voila, a beautifully blurred image.

I've created a branch from my MetalKit Particles project to demonstrate MPS (sadly, at Beta 2, MPS is only supported under iOS. Hopefully OS X is coming soon). This demo contains a particle system to which I apply two filters and present the user with a pair of segmented controls so they can select from a list of seven filter options:


All the MPS filters extend MPSUnaryImageKernel which contains encodeToCommandBuffer() so I have an array of type [MPSUnaryImageKernelwhich includes my seven filters:


    let blur = MPSImageGaussianBlur(device: device, sigma: 3)
    let sobel = MPSImageSobel(device: device)
    let dilate = MPSImageAreaMax(device: device, kernelWidth: 5, kernelHeight: 5)
    let erode = MPSImageAreaMin(device: device, kernelWidth: 5, kernelHeight: 5)
    let median = MPSImageMedian(device: device, kernelDiameter: 3)
    let box = MPSImageBox(device: device, kernelWidth: 9, kernelHeight: 9)
    let tent = MPSImageTent(device: device, kernelWidth: 9, kernelHeight: 9)
    

    filters = [blur, sobel, dilate, erode, median, box, tent]


I've extended my ParticleLab component to accept a tuple of two integers that defines which filters to use:

    var filterIndexes: (one: Int, two: Int) = (0, 3)

...and apply the MPS kernels base on those filter indexes:

    filters[filterIndexes.one].encodeToCommandBuffer(commandBuffer, sourceTexture: texture, destinationTexture: drawable.texture)
    
    filters[filterIndexes.two].encodeToCommandBuffer(commandBuffer, sourceTexture: drawable.texture, destinationTexture: texture)


The final results can be quite pretty: here's an "ink in milk drop" style effect created with a Gaussian blur and dilate filter:


This code is available at my GitHub repo here. This code requires Xcode 7 (Beta 2) and an A8 or A8x device running iOS 8 (Beta 2). Enjoy!

Using MetalPerformanceShaders on Images with MTKTextureLoader

$
0
0


My earlier post, A First Look at Metal Performance Shaders in iOS 9, is all very well and good for using Apple's new Metal Performance Shaders (MPS) framework to filter scenes generated in Metal, but how could you use MPS to filter ordinary images such a PNG or JPG?

This is where the new MTKTextureLoader comes into play. This class hugely simplifies the effort required to create Metal textures from common image formats and once an image is a Metal texture, we can use the code from earlier to apply MPS filters to it.

Let's take a simple example where we want to add a Gaussian blur and Sobel edge detection to an image, flower.jpg. We're going to create a simple single view iOS 9 project and, in the view did load function, check the device supports Metal:

    guardlet device = MTLCreateSystemDefaultDevice() else
    {
        // device doesn't support metal - handle appropriately 
        return

    }

...if all is good, we can continue and load an image and take a note of its size:

    let image = UIImage(named: "flower.jpg")

    let imageSize: CGSize = (image?.size)!

Now we know the image size, we can create an MTKView and add it to the stage - this component will display our filtered image:

    let metalView = MTKView(frame: CGRect(x: 30, y: 30, width: imageSize.width / 2, height: imageSize.height / 2))
    metalView.framebufferOnly = false

    view.addSubview(metalView)

Now for the magic: using the image's CGImage property, we create a texture loader and invoke textureWithCGImage() to create a Metal texture that represents the image:

    let imageTexture:MTLTexture
    let textureLoader = MTKTextureLoader(device: device)
    do
    {
        imageTexture = try textureLoader.textureWithCGImage((image?.CGImage!)!, options: nil)
    }
    catch
    {
        // unable to create texture from image
        return

    }

Because we're going to apply two filters, we also create an intermediate texture that bridges between the two:

    let intermediateTextureDesciptor = MTLTextureDescriptor.texture2DDescriptorWithPixelFormat(MTLPixelFormat.RGBA8Unorm, width: Int(imageSize.width), height: Int(imageSize.height), mipmapped: false)

    let intermediateTexture = device.newTextureWithDescriptor(intermediateTextureDesciptor)

We can now create our two filter objects:

    let blur = MPSImageGaussianBlur(device: device, sigma: 5)

    let sobel = MPSImageSobel(device: device)

Then some familiar Metal code to create a command queue and command buffer:

    let commandQueue = device.newCommandQueue()

    let commandBuffer = commandQueue.commandBuffer()

...and using the intermediate texture, execute the two filters with the metal view's currentDrawable!.texture as the final target:

    sobel.encodeToCommandBuffer(commandBuffer, sourceTexture: imageTexture, destinationTexture: intermediateTexture)


    blur.encodeToCommandBuffer(commandBuffer, sourceTexture: intermediateTexture, destinationTexture: metalView.currentDrawable!.texture)

Finally, we can display the image on the screen:

    commandBuffer.presentDrawable(metalView.currentDrawable!)
    

    commandBuffer.commit();

Easy! 


As a point to note: Core Image filters will actually be powered my Metal Performance Filters in iOS 9, so it's unlikely you'll need to do this for kernels such as Gaussian blur. But this is useful knowledge if you want to cut out the Core Image layer and use MPS filters directly.

Applying CIFilters to a Live Camera Feed with Swift

$
0
0


Here's a fun little demo project that you may find useful as a starting point for your own work: a Swift app for iOS that applies a Core Image filter (I've used a CIComicEffect - one of the new filters available in iOS 9) and displays the resulting image on screen.

To kick off this work, I turned to Camera Capture on iOS from objc.io for the basics. My code omits some of the authorisation and error checking and just contains the bare bones to get up and running. If you want to create a production app, I suggest you head over to that article. 

In a nutshell, the app creates a capture session, an input (the camera) and an output. The output is captured, via AVCaptureVideoDataOutputSampleBufferDelegate, and that captured data is fed into a Core Image filter.

The steps, therefore, are:

Create the AVCaptureSession which coordinates the flow of data from the input to the output:


    let captureSession = AVCaptureSession()
    captureSession.sessionPreset = AVCaptureSessionPresetPhoto

Create an AVCaptureDevice which represents a physical capture device, in this case a camera:


    let backCamera = AVCaptureDevice.defaultDeviceWithMediaType(AVMediaTypeVideo)

Create a concrete implementation of the device and attach it to the session. In Swift 2, instantiating AVCaptureDeviceInput can throw an error, so we need to catch that:


    do
    {
        let input = tryAVCaptureDeviceInput(device: backCamera)
        
        captureSession.addInput(input)
    }
    catch
    {
        print("can't access camera")
        return
    }

Now, here's a little 'gotcha': although we don't actually use an AVCaptureVideoPreviewLayer  but it's required to get the sample delegate working, so we create one of those:


    // although we don't use this, it's required to get captureOutput invoked
    let previewLayer = AVCaptureVideoPreviewLayer(session: captureSession)

    view.layer.addSublayer(previewLayer)

Next, we create a video output, AVCaptureVideoDataOutput which we'll use to access the video feed:


    let videoOutput = AVCaptureVideoDataOutput()

Ensuring that self implements AVCaptureVideoDataOutputSampleBufferDelegate, we can set the sample buffer delegate on the video output:


     videoOutput.setSampleBufferDelegate(self
        queue: dispatch_queue_create("sample buffer delegate", DISPATCH_QUEUE_SERIAL))

The video output is then attached to the capture session:


     captureSession.addOutput(videoOutput)

...and, finally, we start the capture session:


    captureSession.startRunning()

Because we've set the delegate, captureOutput will be invoked with each frame capture. captureOutput is passed a sample buffer of type CMSampleBuffer and it just takes two lines of code to convert that data to a CIImage for Core Image to handle:


    let pixelBuffer = CMSampleBufferGetImageBuffer(sampleBuffer)
    let cameraImage = CIImage(CVPixelBuffer: pixelBuffer!)

...and that image data is passed to our Comic Book effect which, in turn, is used to populate an image view:


    let comicEffect = CIFilter(name: "CIComicEffect")

    comicEffect!.setValue(cameraImage, forKey: kCIInputImageKey)
    
    let filteredImage = UIImage(CIImage: comicEffect!.valueForKey(kCIOutputImageKey) as! CIImage!)
    
    dispatch_async(dispatch_get_main_queue())
    {
        self.imageView.image = filteredImage
    }

Easy! 

All of this code is available at my GitHub repository here.

Generating & Filtering Metal Textures From Live Video

$
0
0

My last post, Applying CIFilters to a Live Camera Feed with Swift, showed the basics of setting up an AVCaptureSession to create and filter CIImages. This post expands on that and discusses using the same capture session fundamentals to create a Metal texture and apply a MetalPerformanceShader Gaussian blur to it.

You could use this technique to apply your own Metal kernel functions to images for video processing or for mapping camera feeds onto 3D objects in Metal scenes.

The function that will do the hard work is CVMetalTextureCacheCreateTextureFromImage and the implementation of this may not be immediately obvious since it contains two YCbCr'planes' - one that holds the luma component and the other than holds the blue and red differences. Our application has to generate two metal textures from those planes and, with a small compute shader, generate an RGB one to display to the user.

Before we start, I need to thank McZonk for their work doing this in Objective-C. This article proved invaluable in getting this demo working and discusses the technique in great detail.

After setting up the AVFoundation stuff, to get up and running in Swift we need to follow these steps:

First we need to create texture caches for the two textures using CVMetalTextureCacheCreate using a Metal device:

    let device = MTLCreateSystemDefaultDevice()

    // Texture for Y
    CVMetalTextureCacheCreate(kCFAllocatorDefault, nil, device, nil, &videoTextureCache)
        
    // Texture for CbCr
    CVMetalTextureCacheCreate(kCFAllocatorDefault, nil, device, nil, &videoTextureCache)

Next, inside the captureOutput() function we create a Core Video texture reference which supplies source image data to Metal. From the pixel buffer we can figure out the size of our texture for the plane we want to use:

    let pixelBuffer = CMSampleBufferGetImageBuffer(sampleBuffer)

    var cbcrTextureRef : Unmanaged<CVMetalTextureRef>?
    
    let cbcrWidth = CVPixelBufferGetWidthOfPlane(pixelBuffer!, 1);

    let cbcrHeight = CVPixelBufferGetHeightOfPlane(pixelBuffer!, 1);

...and with that information, we can populate the CVMetalTextureRef from the buffer:

    CVMetalTextureCacheCreateTextureFromImage(kCFAllocatorDefault,
        videoTextureCache!.takeUnretainedValue(),
        pixelBuffer!,
        nil,
        MTLPixelFormat.RG8Unorm,
        cbcrWidth, cbcrHeight, 1,

        &cbcrTextureRef)

The penultimate step is to get the Metal texture from the Core Video texture:

    let cbcrTexture = CVMetalTextureGetTexture((cbcrTextureRef?.takeUnretainedValue())!)

...and finally, we need to release that texture reference:

  cbcrTextureRef?.release()

These steps are repeated for the luma plane, replacing '1' for '0' in CVPixelBufferGetHeightOfPlane and CVMetalTextureCacheCreateTextureFromImage.

I've created a small compute shader based on McZonk's fragment shader to convert the two textures to a single RGB texture. This shader combines the Y and CbCr channels into a single RGB output using a color matrix. One thing to note is that the CbCr texture is half the size of the Y plane because of the way the colors are sampled, so my shader looks like:

kernelvoid YCbCrColorConversion(texture2d<float, access::read> yTexture [[texture(0)]],
                                       texture2d<float, access::read> cbcrTexture [[texture(1)]],
                                       texture2d<float, access::write> outTexture [[texture(2)]],
                                       uint2 gid [[thread_position_in_grid]])
    {
        float3 colorOffset = float3(-(16.0/255.0), -0.5, -0.5);
        float3x3 colorMatrix = float3x3(
                                        float3(1.1641.164, 1.164),
                                        float3(0.000, -0.392, 2.017),
                                        float3(1.596, -0.813, 0.000)
                                        );
        
        uint2 cbcrCoordinates = uint2(gid.x / 2, gid.y / 2); 
        
        float y = yTexture.read(gid).r;
        float2 cbcr = cbcrTexture.read(cbcrCoordinates).rg;
        
        float3 ycbcr = float3(y, cbcr);
        float3 rgb = colorMatrix * (ycbcr + colorOffset);

        outTexture.write(float4(float3(rgb), 1.0), gid);
    }

For the win, I've plugged in the Gaussian blur Metal Performance Shader. I've taken a slightly different approach to my previous implementations in that I'm using an "in place texture". This removes the need for an intermediate texture, so the guts of my Swift Metal code looks like this:

    commandEncoder.setTexture(ytexture, atIndex: 0)
    commandEncoder.setTexture(cbcrTexture, atIndex: 1)
    commandEncoder.setTexture(drawable.texture, atIndex: 2) // out texture
    
    commandEncoder.dispatchThreadgroups(threadgroupsPerGrid, threadsPerThreadgroup: threadsPerThreadgroup)
    
    commandEncoder.endEncoding()
    
    let inPlaceTexture = UnsafeMutablePointer<MTLTexture?>.alloc(1)
    inPlaceTexture.initialize(drawable.texture)
    
    blur.encodeToCommandBuffer(commandBuffer, inPlaceTexture: inPlaceTexture, fallbackCopyAllocator: nil)

    commandBuffer.presentDrawable(drawable)
    

    commandBuffer.commit();

The sigma value of the blur is controlled by a horizontal value slider which has a maximum value of 50 - the Metal Performance Shader implementation of Gaussian blur is ludicrously fast! 

This code works under Xcode 7 beta 3 and iOS 9 beta 3 on my iPad Air 2. I can't guarantee it will work on any other platforms, but it you get it running elsewhere, I'd love to hear about  it!

The project is available at my GitHub repository here.

Controlling Metal Reaction Diffusion Systems with the iPad Camera

$
0
0

Here's a funky Swift and Metal experiment that uses the Metal-texture-from-video technique I described in my recent blog post, Generating & Filtering Metal Textures From Live Video.

Here, I'm only using the luma component from the video feed as an input to the reaction diffusion compute shader I used in my ReDiLab app. The luma value at each pixel is used to tweak the parameters by an amount I've reached through some tinkering.

The application has only been tested on my iPad Air 2 under OS 9 beta 3. Because it's just a quick-and-dirty experiment, there's not much in the way of defensive coding, but if you're yearning for a psychedelic experience, give it a go! The video above was generated by pointing my iPad at a screen playing one of my favourite films, Napoleon Dynamite.

As a point of interest, the initial noise texture is created using Model I/O's MDLNoiseTexture. To convert to a MTLTexture, I use the noise texture's texel data to replace a region in my metal texture, textureA:

    let noise = MDLNoiseTexture(scalarNoiseWithSmoothness: 0.75,
        name: nil,
        textureDimensions: [Int32(Width), Int32(Height)],
        channelCount: 4,
        channelEncoding: MDLTextureChannelEncoding.UInt8,
        grayscale: false)

    let noiseData = noise.texelDataWithBottomLeftOrigin()

    let region = MTLRegionMake2D(0, 0, Int(Width), Int(Height))

    iflet noiseData = noiseData
    {
        textureA.replaceRegion(region,
            mipmapLevel: 0,
            withBytes: noiseData.bytes,
            bytesPerRow: Int(bytesPerRow))
    }

There are some other nice Model I/O procedural textures including a sky cube for creating a simulation of a sunlit sky and a color swatch texture based on color temperature

As always, the source code for this project is available army GitHub repository here. Enjoy!

A First Look at Model I/O's Sky Cube Texture

$
0
0

My recent blog post, Controlling Metal Reaction Diffusion Systems with the iPad Camera, demonstrated using Model I/O's procedural noise texture in a Metal scene. This post looks at using Model I/O's MDLSkyCubeTexture in s SceneKit project.

MDLSkyCubeTexture procedurally generates a physically realistic simulation of a sunlit sky. It's ideal for use as a background or a reflection map and, excitingly, it can be used in conjunction with Model I/O's light probe to create irradiance maps to light 3D geometry based on textures.

As an introduction to the fundaments of using MDLSkyCubeTexture, I've created a simple demo application based on SceneKit that contains a rotating torus using the sky cube texture as a reflection map. I've also applied the same texture as the scene's background. 

Creating the sky cube texture (which is of type MDLTexture) is pretty simple. Its initialiser requires some basic properties:

  • Turbidity: A measure of dust and humid in the atmosphere. A value of zero simulates a clear sky while a value of one causes the sun's color to spread.
  • Sun Elevation: A value of 0.5 puts the sun level with the horizon, 1 puts the sun directly overhead and 0 directly underneath.
  • Upper Atmosphere Scattering: A value of 0 gives warm, sunset colors, while a value of 1 simulates noon colors.
  • Ground Albedo: The amount that light bounces back up into the sky from the ground. A value of 0 gives a clear sky, while a value of 1 simulates a slight fog. 

The code to instantiate the cube texture looks like:

    let sky = MDLSkyCubeTexture(name: nil,
        channelEncoding: MDLTextureChannelEncoding.UInt8,
        textureDimensions: [Int32(160), Int32(160)],
        turbidity: 0,
        sunElevation: 0,
        upperAtmosphereScattering: 0,

        groundAlbedo: 0)

With the help of UIStackView, I've laid out my screen with a main SceneKit view and four sliders for controlling those properties. When any of the sliders are changed, sliderChangeHandler() is invoked to update the sky cube texture. 

This is quite a heavy weight operation, so I do it in a background thread to keep the user interface responsive. But in a nutshell, I set the four properties discussed above from their respective sliders:

    self.sky.turbidity = self.turbiditySlider.value
    self.sky.upperAtmosphereScattering = self.upperAtmosphereScatteringSlider.value
    self.sky.sunElevation = self.sunElevationSlider.value
    self.sky.groundAlbedo = self.groundAlbedoSlider.value

Then explicitly update the texture:

    self.sky.updateTexture()

From the updated texture, I can get an unmanaged object reference to the CGImage of the sky cube and assign it to the reflective property of the torus's material and to the background property of my scene:

    self.material.reflective.contents = self.sky.imageFromTexture()?.takeUnretainedValue()
    self.sceneKitScene.background.contents = self.sky.imageFromTexture()?.takeUnretainedValue()

...and that's all there is to it! This code was written under Xcode 7 beta 3 and tested on an iPad Air 2 running iOS 9 beta 3. The source code for the project is available at my GitHub repository here. Enjoy!

Hybrid Marking Menu / Radial Slider Swift Component for iOS

$
0
0


Over the last few weeks, I've been evolving my original marking menu component for iOS and made some pretty significant changes:

  • Distributing the menu items over a full circle meant that often some items were hidden by my finger. Although positioning the menu in the centre of the screen mitigated this somewhat, I've now changed the layout to a semi-circle from 9 o'clock through 3 o'clock.
  • The marking menu now pops up at the touch position.
  • Marking menu items can now be radial sliders to set a normalised value. The radial sliders position themselves underneath the touch location. By moving the touch away from the origin and, therefore, increasing the radius of the radial dial, the user can increase the size of the radial dial to make very precise changes.
  • Marking menu items can be set to selected and be given categories

To demonstrate these changes, I've updated the demonstration application. The application allows the user to add different blur and sharpen filters and update the blur and sharpen amounts along with the brightness, saturation and contrast. 

The top level menu contains three items: Blur, Sharpen and Color Adjust.

Blur contains three items to select the blur type and a slide. Its definition in Swift looks like this:


    let blurAmountSlider = FMMarkingMenuItem(label: "Blur Amount", valueSliderValue: 0)


    let blurTopLevel = FMMarkingMenuItem(label: FilterCategories.Blur.rawValue, subItems:[
        FMMarkingMenuItem(label: FilterNames.CIGaussianBlur.rawValue, category: FilterCategories.Blur.rawValue, isSelected: true),
        FMMarkingMenuItem(label: FilterNames.CIBoxBlur.rawValue, category: FilterCategories.Blur.rawValue),
        FMMarkingMenuItem(label: FilterNames.CIDiscBlur.rawValue, category: FilterCategories.Blur.rawValue),
        blurAmountSlider])

You can see here that the slider uses the valueSliderValue constructor which sets its isValueSlider property to true. When the user marks over that menu item, the radial slider pops up.

You may also notice that the other three items have a category set. Although the marking menu component does't really care about categories, the host application may do. In my demo application, I only want the user to be able to select one type of blur; either Gaussian, Box or Disc. 

To do this, all three items share the same Blur category and in my FMMarkingMenuItemSelected delegate method, I invoke setExclusivelySelected to force only one selected menu item per category:


    FMMarkingMenu.setExclusivelySelected(markingMenuItem, markingMenuItems: markingMenuItems)

Selected menu items are coloured red and have their isSelected property set to true.

The changes the layout are set by some Boolean properties. If and when I post this component to OS X (where using a mouse means my chubby fingers won't hide the menu), the layout can be returned to a full circle by setting layoutMode to FMMarkingMenuLayoutMode.Circular.

This version of FMMarkingMenu is written in Swift 2.0 under Xcode 7 and I've only been able to test it on an iPad running iOS 9. The code makes liberal use of the new guard syntax which I absolutely love (see this great article from Natasha The Robot to learn more about guard). Being able to optionally bind a load of constants and easily exit a method early if one of them fails makes coding a breeze:


    guardlet category = FilterCategories(rawValue: markingMenuItem.category!),
        filterName = FilterNames(rawValue: markingMenuItem.label)?.rawValueelse
    {
        return

    }

I hope this post offers a good insight into the component. Please reach out to me via Twitter (@FlexMonkey) if you have a questions or comments. The source code for the project lives in my GitHub repository here

Finally, a note on patent issues. I've reached out to Autodesk to ask about patent infringement issues without success. I'm confident that my component is sufficiently different from theirs (especially with all these recent changes) that there is no infringement. Furthermore, there's plenty of "prior art" (for example Don Hopkins has been playing with radial menus in the Sims for years) and other applications (e.g. Modo and Blender) use similar interaction paradigms.

Event Dispatching in Swift with Protocol Extensions

$
0
0

One of the highlights for Swift 2.0 at WWDC was the introduction of protocol extensions: the ability to add default method implementations to protocols. Plenty has been written about protocol oriented programming in Swift since WWDC from bloggers such as SketchyTech, David Owens and Ray Wenderlich, and I thought it was high time to put my own spin on it.

After working with event dispatching in ActionScript for may years, protocol extensions seemed the perfect technique to implement a similar pattern in Swift. Indeed, protocol extensions offer the immediate advantage that I can add event dispatching to any type of object without the need for that object to extend a base class. For example, not only can user interface components dispatch events, but value objects and data structures can too: perfect for the MVVM pattern where a view may react to events on the view model to update itself. 

My project, Protocol Extension Event Dispatcher, contains a demonstration application containing a handful of user interface components: a slider, a stepper, a label and a button. There's a single 'model': an integer that dispatches a change event when its value changes via those components.  The end result is when the user interacts with any component, the entire user interface updates, via events, to reflect the change. 

This isn't meant to be a complete implementation of event dispatching in Swift, rather a demonstration of what's possible in Swift with protocol oriented programming. For a more complete version, take a look at ActionSwift

Let's take a look at how my code works. First of all, I have my protocol, EventDispatcher  which defines a handful of methods. It's a class protocol, because we want the dispatcher to be a single reference object:

    protocol EventDispatcher: class
    {
        func addEventListener(type: EventType, handler: EventHandler)
        
        func removeEventListener(type: EventType, handler: EventHandler)
        
        func dispatchEvent(event: Event)
    }

Each instance of an object that conforms to EventDispatcher will need a little repository of event listeners which I store as a dictionary with the event type as the key and a set of event handlers as the value.

The first stumbling block is that extensions may not contain stored properties. There are a few options to overcome this issue: I could create a global repository or I could use objc_getAssociatedObject and objc_setAssociatedObject. These functions all me to attach the event listeners to each EventDispatcher instance with some simple syntax. The code for my default implementation of addEventListener looks like:

extensionEventDispatcher
{
    func addEventListener(type: EventType, handler: EventHandler)
    {
        var eventListeners: EventListeners
        
        iflet el = objc_getAssociatedObject(self, &EventDispatcherKey.eventDispatcher) as? EventListeners
        {
            eventListeners = el
            
            iflet_ = eventListeners.listeners[type]
            {
                eventListeners.listeners[type]?.insert(handler)
            }
            else
            {
                eventListeners.listeners[type] = Set<EventHandler>([handler])
            }
        }
        else
        {
            eventListeners = EventListeners()
            eventListeners.listeners[type] = Set<EventHandler>([handler])
        }
        
        objc_setAssociatedObject(self,
            &EventDispatcherKey.eventDispatcher,
            eventListeners,
            objc_AssociationPolicy.OBJC_ASSOCIATION_RETAIN)
    }

}

For a given type and event handler, I check to see if there's an existing EventListeners object, if there is, I check to see if that object has an entry for the type and create or update values accordingly. Once I have my up-to-date EventListeners object, I can write it back with objc_setAssociatedObject.

In a similar fashion, for dispatchEvent()  I query for an associated object, check the handlers for the event type and execute them if there are any:

extensionEventDispatcher
{
    func dispatchEvent(event: Event)
    {
        guardlet eventListeners = objc_getAssociatedObject(self, &EventDispatcherKey.eventDispatcher) as? EventListeners,
            handlers = eventListeners.listeners[event.type]
            else
        {
            // no handler for this object / event type
            return
        }
        
        for handler in handlers
        {
            handler.function(event)
        }
    }

}

I've created a simple wrapper that utilises generics to allow any data type to dispatch an event when it changes:

class DispatchingValue: EventDispatcher
{
    requiredinit(_ value: T)
    {
        self.value = value
    }
    
    var value: T
    {
        didSet
        {
            dispatchEvent(Event(type: EventType.change, target: self))
        }
    }

}

My demo application uses DispatchingValue to wrap an integer:

    let dispatchingValue = DispatchingValue(25)

...which updates the user interface controls when it changes by adding an event listener:

    let dispatchingValueChangeHandler = EventHandler(function: {
        (event: Event) in
        self.label.text = "\(self.dispatchingValue.value)"
        self.slider.value = Float(self.dispatchingValue.value)
        self.stepper.value = Double(self.dispatchingValue.value)
        })

    dispatchingValue.addEventListener(.change, handler: dispatchingValueChangeHandler)

I've also created an extension onto UIControl that makes all UI controls conform to EventDispatcher and dispatch change and tap events:

extensionUIControl: EventDispatcher
{
    overridepublicfunc didMoveToSuperview()
    {
        super.didMoveToSuperview()
        
        addTarget(self, action: "changeHandler", forControlEvents: UIControlEvents.ValueChanged)
        addTarget(self, action: "tapHandler", forControlEvents: UIControlEvents.TouchDown)
    }
    
    overridepublicfunc removeFromSuperview()
    {
        super.removeFromSuperview()
        
        removeTarget(self, action: "changeHandler", forControlEvents: UIControlEvents.ValueChanged)
        removeTarget(self, action: "tapHandler", forControlEvents: UIControlEvents.TouchDown)
    }
    
    func changeHandler()
    {
        dispatchEvent(Event(type: EventType.change, target: self))
    }
    
    func tapHandler()
    {
        dispatchEvent(Event(type: EventType.tap, target: self))
    }

}

So, my slider, for example, can update dispatchingValue when the user changes its value:

    let sliderChangeHandler = EventHandler(function: {
        (event: Event) in
        self.dispatchingValue.value = Int(self.slider.value)
    })
    
    slider.addEventListener(.change, handler: sliderChangeHandler)

...which in turn will invoke dispatchingValueChangeHandler and update the other user interface components. My reset button sets the value of dispatchingValue to zero when tapped:

    let buttonTapHandler = EventHandler(function: {
        (event: Event) in
        self.dispatchingValue.value = 0
    })
    

    resetButton.addEventListener(.tap, handler: buttonTapHandler)

I hope this post gives a taste of the incredible power offered by protocol oriented programming. Once again, my project is available at my GitHub repository here. Enjoy!

Metal Performance Shaders & Fallback Copy Allocators

$
0
0

One of the options available when using Metal Performance Shaders is to filter textures in place. This is discussed in What's New in Metal Part 2, but the actual implementation is slightly glossed over. Worse than that, fallback copy allocators didn't actually work until the latest iOS 9 beta build, so if you've been struggling, here's a quick blog post to help.

When filtering a source texture and populating a destination texture, encodeToCommandBuffer() has this signature:

    encodeToCommandBuffer(commandBuffer, sourceTexture: srcTexture, destinationTexture: targetTexture)

However, with the following syntax, we can apply a filter to a texture in place:

    encodeToCommandBuffer(commandBuffer, inPlaceTexture: inPlaceTexture, fallbackCopyAllocator: copyAllocator)

Some filters, such as MPSImageMedian are unable to filter in place and in this situation, we need to create an instance of MPSCopyAllocator which will create a texture and ensure the in-place version of encodeToCommandBuffer will always succeed. There isn't actually a descriptorFromTexture() method available (as shown in the WWDC video), so the correct Swift definition of copyAllocator is:

    let copyAllocator: MPSCopyAllocator =
    {
        (kernel: MPSKernel, buffer: MTLCommandBuffer, sourceTexture: MTLTexture) -> MTLTexturein
        
        let descriptor = MTLTextureDescriptor.texture2DDescriptorWithPixelFormat(sourceTexture.pixelFormat,
            width: sourceTexture.width,
            height: sourceTexture.height,
            mipmapped: false)
        
        let targetTexture: MTLTexture = buffer.device.newTextureWithDescriptor(descriptor)
     
        return targetTexture

    }

...and now the following will work:

    let median = MPSImageMedian(device: device!, kernelDiameter: 3)
    
    median.encodeToCommandBuffer(commandBuffer, inPlaceTexture: inPlaceTexture, fallbackCopyAllocator: copyAllocator)

Easy!

iOS Live Camera Controlled Particles in Swift & Metal

$
0
0

My latest Swift and Metal experiment borrows from my recent post Generating & Filtering Metal Textures From Live Video and from my numerous posts about my Metal GPU based particle system, ParticleLab.

ParticleCam is a small app that takes the luminosity layer from the device's rear camera and passes it into my particle shader. In the shader code, I look at the value of each particle's neighbouring pixels and, after a bit of averaging, adjust that particle's linear momentum so that it moves towards brighter areas of the camera feed.

With the Retina Display of my iPad Air 2, the final result is an ethereal, nebulous particle system that reflects the image. It works well with slow moving subjects that contrast against a fairly static background. The video above was created by pointing my iPad at a screen running a video of a woman performing Tai Chi. The screen recording was done using QuickTime and sadly seems to have lost a little of that ethereal quality in compression.

The source code for ParticleCam is available at my GitHub repository here. I've only tested it on my iPad Air 2 using Xcode 7.0 beta 5 and iOS 9 beta 5.

Easy Group Based Layout for Swift with Shinpuru Layout

$
0
0

One of the joys of working with Apache Flex is easy user-interface layout using horizontal and vertical groups. I haven't worked much with Xcode's interface builder and Visual Format Language looks a little bit fragile with its strange grammar, so I though it would be an interesting exercise to create my own group based layout components that mimic Flex's.

By building a hierarchy of groups, pretty much any type of layout can be constructed. In this illustration, I've mimicked the layout of the original Softimage which was a 3D modelling and animation application:


The top level group is vertically aligned: its first child being a horizontal group containing five labels, the second child is also a horizontal group containing a vertical group of buttons, then a grey 'workspace' followed by another vertical group of buttons, and the final child of the top level group is another horizontal group containing a horizontal slider.

Another example is my recent depth of field demonstration:


In my original implementation, the code inside viewDidLayoutSubviews() looked like this (you may need to sit down for this):

    overridefunc viewDidLayoutSubviews()
    {
        dofViewer.frame = CGRect(x: 20, y: 20, width: view.frame.width - 30, height: view.frame.height - 140)
        
        let qtrWidth = (view.frame.width - 40) / 4
        
        distanceWidget.frame = CGRect(x: 20, y: view.frame.height - 120, width: qtrWidth, height: 50).rectByInsetting(dx: 5, dy: 0)
        focalSizeWidget.frame = CGRect(x: 20 + qtrWidth, y: view.frame.height - 120, width: qtrWidth, height: 50).rectByInsetting(dx: 5, dy: 0)
        focalBlurWidget.frame = CGRect(x: 20 + qtrWidth * 2, y: view.frame.height - 120, width: qtrWidth, height: 50).rectByInsetting(dx: 5, dy: 0)
        apertureWidget.frame = CGRect(x: 20 + qtrWidth * 3, y: view.frame.height - 120, width: qtrWidth, height: 50).rectByInsetting(dx: 5, dy: 0)
        
        fogStartWidget.frame = CGRect(x: 20, y: view.frame.height - 60, width: qtrWidth, height: 50).rectByInsetting(dx: 5, dy: 0)
        fogEndWidget.frame = CGRect(x: 20 + qtrWidth, y: view.frame.height - 60, width: qtrWidth, height: 50).rectByInsetting(dx: 5, dy: 0)
        fogDensityExponentWidget.frame = CGRect(x: 20 + qtrWidth * 2, y: view.frame.height - 60, width: qtrWidth, height: 50).rectByInsetting(dx: 5, dy: 0)
        
        creditLabel.frame = CGRect(x: 20 + qtrWidth * 3, y: view.frame.height - 60, width: qtrWidth, height: 50).rectByInsetting(dx: 5, dy: 0)

    }

Not only is the code fragile and hard to understand, adding or removing components or tweaking the layout is long-winded and complicated.

Using Shinpuru Layout, I simply create a top level vertical group (SLVGroup) and two horizontal groups (SLHGroup) for the two rows of sliders:

    let mainGroup = SLVGroup()
    let upperToolbar = SLHGroup()

    let lowerToolbar = SLHGroup()

...add the sliders to their appropriate toolbar:

    let apertureWidget = LabelledSegmentedControl(items: ["f/2", "f/2.8", "f/4", "f/5.6", "f/8"], label: "Aperture")
    initialiseWidget(apertureWidget, selectedIndex: 1, targetGroup: upperToolbar)

    [...]

    func initialiseWidget(widget: LabelledSegmentedControl, selectedIndex: Int, targetGroup: SLGroup)
    {
        targetGroup.addSubview(widget)

        widget.selectedSegmentIndex = selectedIndex
        widget.addTarget(self, action: "cameraPropertiesChange", forControlEvents: .ValueChanged)
    }

...add the toolbars and the main SceneKit component (dofViewer) to the main group's children array:

    mainGroup.children = [dofViewer, upperToolbar, lowerToolbar]

...and finally anchor the main group to the view's bounds:

    overridefunc viewDidLayoutSubviews()
    {
        let top = topLayoutGuide.length
        let bottom = bottomLayoutGuide.length
        
       mainGroup.frame = CGRect(x: 0, y: top, width: view.frame.width, height: view.frame.height - top - bottom).rectByInsetting(dx: 10, dy: 10)

    }

...and, voila! My Shinpuru Layout handles all the sizing itself. 

The children of Shinpuru Layout containers can be any UIView - from buttons to sliders to images. By default, these children will be evenly distributed across the width of a horizontal group or the height of a vertical group. In this example, I've added ten UILabels with an orange background to a SLHGroup and Shinpuru has sized them all to 10% of the total width:


However, if you subclass a UIView and have it implement SLLayoutItem, Shinpuru offers additional control over the widths or heights of child elements. The protocol contains two optional properties:

  • percentageSize - allows the setting of the width or height as a percentage of the parent's width (for SLHGroup) or height (for SLVGroup)
  • explicitSize - ignored if the percentageSize is not nil, otherwise allows the setting of the height or width in points.

Both of these properties can be left as nil to leave all the sizing to Shinpuru. 

Shinpuru containers can have a mixture of SLLayoutItems with both percentage and explicit sizes and regular UIView components. In this example, a SLHGroup contains a 250 point explicitly sized SLLayoutItem, a 33% SLLayoutItem, a UILabel and a 75 point explicitly sized SLLayoutItem (the SLLayoutItems have a purple background and the UILabels have an orange background):


Nesting groups allows for more complex layouts. In this example, the second item of a SLHGroup is a SLVGroup which contains a UILabel, another SLHGroup with three additional labels and a final label with an explicit height of 25 pixels:


The code for the layout components isn't that tricky. Both the SLHGroup and SLVGroup extend a base class, SLGroup. Before the didSet observer on its children does all the maths, it removes any old components and adds the new ones as subviews:

    oldValue.map({ $0.removeFromSuperview() })

    children.map({ super.addSubview($0) })

It then populates totalExplicitSize with the sum of all the child components with an explicit size set:

    func hasExplicitSize(value: UIView) -> Bool
    {
        return (value as? SLLayoutItem)?.explicitSize != nil&& !hasPercentage(value)

    }

    totalExplicitSize = children.filter({ hasExplicitSize($0) }).reduce(CGFloat(0), combine: {$0 + ($1 as! SLLayoutItem).explicitSize!});

It then populates totalPercentages with the sum of all the child components with a percentage size set:

    func hasPercentage(value: UIView) -> Bool
    {
        return (value as? SLLayoutItem)?.percentageSize != nil

    }

    totalPercentages = children.filter({ hasPercentage($0) }).reduce(CGFloat(0), combine: {$0 + ($1 as! SLLayoutItem).percentageSize!})

Now we know the sum of all the percentages, that value can be subtracted from 100 and divided between the remaining components and that value is defined as defaultComponentPercentage:

    let defaultComponentPercentage = (CGFloat(100) - totalPercentages) / CGFloat(children.filter({ !hasPercentage($0) && !hasExplicitSize($0) }).count)

The final piece of the puzzle is to populate an array named childPercentageSizes which is parallel to the children array and contains either the defined percentageSize or the defaultComponentPercentage for the nil percentageSized components:

    childPercentageSizes = children.map({ hasPercentage($0) ? ($0 as! SLLayoutItem).percentageSize! : defaultComponentPercentage })

Calling setNeedsLayout() will force either the horizontal or vertical implementation of SLGroup to invoke its layoutSubviews() method and in here, Shinpuru uses the work done above to size the components.

In the SLHGroup, for example, layoutSubviews() loops over an enumeration of the children array:

    overridefunc layoutSubviews()
    {
        var currentOriginX: CGFloat = 0

        for (index: Int, child: UIView) inenumerate(children)
        {

        [...]

...using the childPercentageSizes array populated earlier, it figures out what the child's width would be if it was percentage based using its own width less the total of the explicit sizes:

        [...]
        let percentageWidth = childPercentageSizes[index] / 100 * (frame.width - totalExplicitSize)
        [...]

...it then calculates and sets the actual size for the child taking into account whether the child has an explicit size:

        [...]
        let componentWidth: CGFloat = hasExplicitSize(child) ? (child as! SLLayoutItem).explicitSize! : percentageWidth
            
        child.frame = CGRect(x: currentOriginX, y: 0, width: componentWidth, height: frame.height).rectByInsetting(dx: margin / 2, dy: 0)

        [...]

Finally, it increments the currentOriginX ready to size and position the next child:

        [...]
        currentOriginX += componentWidth

        [...]

The GitHub project is a demo harness containing four separate implementations of Shinpuru Layout: Complex Grid, Softimage Layout and Depth of Field Demo discussed above and a very simple Align & Distribute which shows how child components can be left, centre or right aligned or distributed evenly:


To use Shinpuru Layout in your own project, you simply need to copy over two files: SLGroup.swift and SLControls.swift.

A thank you to Brian Gesiak for confirming the translation of the Japanese work Shinpuru which means 'simple'. 

Shinpuru is an open source component and the full source code is available at my GitHub repository here. There's more work to do, but from my testing here, what's there is pretty stable and work well. Enjoy!

Zip, Map and Generics: The Evolution of a Swift Function

$
0
0

Let’s imagine, you come into work one bright and sunny Monday morning to find a new requirement has landed in your inbox:

Please create a function that accepts two arrays of Floats and returns a new array of tuples containing those source array items side by side with a third property containing a Boolean indicating whether the items from the input arrays are the same value.

Easy, you think. My function simply needs to look at those two arrays, loop over all the values and, one by one, populate an output array with with a tuple containing the number from the first array, the number from the second and a Boolean indicating whether they are equal. 

A five minute job:

func horizontalJoinCompare_v1(firstArray: [Float], secondArray: [Float]) -> [(Float, Float, Bool)]
{
    var returnArray = [(Float, Float, Bool)]()
    
    let n = min(firstArray.count, secondArray.count)
    
    forvar i = 0; i < n; i++
    {
        returnArray.append((firstArray[i], secondArray[i], firstArray[i] == secondArray[i]))
    }
    
    return returnArray
}

Sure enough, plug in two arrays:

let sourceOne = [Float(2.5), Float(3.9), Float(6.25)]
let sourceTwo = [Float(1.5), Float(3.9), Float(6.05), Float(4.75)]

…and we get just what we expect:

let resultOne = horizontalJoinCompare_v1(sourceOne, sourceTwo) // [(.0 2.5, .1 1.5, .2 false), (.0 3.9, .1 3.9, .2 true), (.0 6.25, .1 6.05, .2 false)]

A cup of tea and a chocolate HobNob later, you remember that Swift 1.2 introduced the zip() function. zip() creates a sequence of pairs built from two input sequences which means you can ditch using subscripting to access each element and use the more elegant for in. Having to repeat the tuple definition, (Float, Float, Bool), is a bit clumsy too, so you decide to use a type alias to save on typing and have code that’s slightly more descriptive:

typealias JoinCompareResult = (Float, Float, Bool)

func horizontalJoinCompare_v2(firstArray: [Float], secondArray: [Float]) -> [JoinCompareResult]
{
    var returnArray = [JoinCompareResult]()
    
    let zippedArrays = zip(firstArray, secondArray)
    
    for zippedItem in zippedArrays
    {
        returnArray.append((zippedItem.0, zippedItem.1, zippedItem.0 == zippedItem.1))
    }

    return returnArray
}

Neater, but could this be improved? Well, Swift is all about being functional, isn’t it. Why loop over that zipped sequence when map() allows us to execute code against the zipped arrays and populate the output array in a much more functional style. To use map(), we need to put the code in a closure which will execute against each item. While we’re at it, why not create another alias for the return array itself:

typealias JoinCompareResults = [(Float, Float, Bool)]

func horizontalJoinCompare_v3(firstArray: [Float], secondArray: [Float]) -> JoinCompareResults
{
    returnArray(zip(firstArray, secondArray)).map
    {
        (zippedItemOne, zippedItemTwo) inreturn (zippedItemOne, zippedItemTwo, zippedItemOne == zippedItemTwo)
    }
}

One thing to note is that zip() returns a SequenceType and map() is a method of Array, so we need to cast the result of zip() to Array.

There’s still some cruft in this function. Do we really need to name the two arguments to the map() function? Actually, no, Swift gives us $0, $1,… as references to the closure arguments, and it doesn’t require an explicit return either, so lets remove the superfluous:

func horizontalJoinCompare_v4(firstArray: [Float], secondArray: [Float]) -> JoinCompareResults
{
    returnArray(zip(firstArray, secondArray)).map { ($0, $1, $0 == $1) }
}

Just as you’re about to treat yourself to a second cup of tea and maybe celebrate writing such a beautiful function by cracking open the Jaffa Cakes, another email arrives. Not only does the function need to compare arrays of floats, it needs to offer similar functionality upon arrays of strings too.

Maybe your immediate thought is to copy and paste your code and simply change the types - after all, Swift’s polymorphism allows for identically named functions with different signatures. Just as you press cmd-c, ping!, another email, “sorry, forgot, your function needs to support integers too”.

Here’s where generics come to the rescue. Rather than specifying a specialised type against the argument of a method, we precede the argument list of a function with type parameters, typically named T, U, etc, in angle brackets. In this next iteration of the horizontalJoinCompare() function, you define the function to accept two arrays which must contain identical types which conform to the Equatable protocol:

typealias GenericJoinCompareResults = [(Equatable, Equatable, Bool)]

func horizontalJoinCompare_v5<T:Equatable>(firstArray: [T], secondArray: [T]) -> GenericJoinCompareResults
{
    returnArray(zip(firstArray, secondArray)).map { ($0, $1, $0 == $1) }
}

Now, not only does our function work as the first version did with arrays of floats:

let resultFive = horizontalJoinCompare_v5(sourceOne, sourceTwo)

…it will also happily accept arrays of strings;

let stringSourceOne = ["ABC", "DEF", "GHI", "JKL"]
let stringSourceTwo = ["AGC", "DEF", "KLZ"]

let resultSix = horizontalJoinCompare_v5(stringSourceOne, stringSourceTwo)

…and there we have it: what started as a slightly clunky and very specialised piece of code is now very generic and very elegant. Easy! 

Addendum: Many thanks to Al Skipp for pointing out that Swift has a global map() function which accepts a sequence as an argument, This means there's no need to case the result of zip() to an array and allows the function to be tidied up even further:

func horizontalJoinCompare_v6<T:Equatable>(firstArray: [T], secondArray: [T]) -> GenericJoinCompareResults
{
    return map(zip(firstArray, secondArray)){ ($0, $1, $0 == $1) }
}

Cheers Al!
Viewing all 257 articles
Browse latest View live