Quantcast
Channel: FlexMonkey
Viewing all 257 articles
Browse latest View live

A Test Driven Custom Swift Zip Function Using Generics

$
0
0

My recent blog post, Zip, Map and Generics, looked at Swift's new zip() function for zipping together two arrays. zip returns a SequenceType with as many items as its shortest input sequence. What if we wanted to create a custom zip function that returned an array with the same length as the longest input and padded the shortest with nil?

The function would work something like:

    let arrayOne = [1, 2, 3, 4]
    let arrayTwo: [String?] = ["AAA", "BBB"]
    let result = longZip(arrayOne, arrayTwo) // expect [(1, "AAA"), (2, "BBB"), (3, nil), (4, nil)]

If, for example, the input arrays were both non-optional strings, [String], our zipped result would need to return optionals, [String?], to allow for that padding. Therefore, using generics again, the signature to longZip, would look like this:

    func longZip(arrayOne:[T], arrayTwo: [U]) -> [(T?, U?)]

This time, let's take a test driven development approach. Before writing any code, we'll write a test. I've created LongZipTests.swift which contains two test arrays:

    let arrayOne = [1, 2, 55, 90]
    let arrayTwo = ["AAA", "BBB"]

My tests will ensure the count of the output is 4, then loop over the output ensuring the output items match the input items or are nil where there is no input:

    func testLongZip_v1()
    {
        let resultOne = longZip_v1(arrayOne, arrayTwo)

        commonAssertions(resultOne)
    }

    func commonAssertions(results: [(Int?, String?)])
    {
        XCTAssert(results.count == 4, "Count")
        
        for (idx: Int, result:(Int?, String?))  in enumerate(results)
        {
            if idx < arrayOne.count
            {
                XCTAssertEqual(result.0!, arrayOne[idx], "Array One Value")
            }
            else
            {
                XCTAssertNil(result.0, "Array One nil")
            }
            
            if idx < arrayTwo.count
            {
                XCTAssertEqual(result.1!, arrayTwo[idx], "Array Two Value")
            }
            else
            {
                XCTAssertNil(result.1, "Array Two nil")
            }
        }
    }

The first implementation of longZip() is pretty simple, use max() to find the longest count, iterate over both arrays with a for loop and populate a return object with the items from those arrays or with nil if we've exceeded the count:

    func longZip_v1(arrayOne:[T], arrayTwo: [U]) -> [(T?, U?)]
    {
        let n = max(arrayOne.count, arrayTwo.count)
        
        var returnObjects = [(T?, U?)]()
        
        forvar i = 0; i < n; i++
        {
            let returnObject: (T?, U?) = (i < arrayOne.count ? arrayOne[i] : nil, i < arrayTwo.count ? arrayTwo[i] : nil)
            
            returnObjects.append(returnObject)
        }
        
        return returnObjects
    }

Pressing command-u executes the tests which tend to work better if your fingers are crossed:

    Test Case '-[FlexMonkeyExamplesTests.FlexMonkeyExamplesTests testLongZip_v1]' started.
    Test Case '-[FlexMonkeyExamplesTests.FlexMonkeyExamplesTests testLongZip_v1]' passed (0.000 seconds).

You can use debugDescription() to be doubly certain:

    [(Optional(1), Optional("AAA")), (Optional(2), Optional("BBB")), (Optional(55), nil), (Optional(90), nil)]

Now we have a working version, it's time to pick apart the code. Version two uses map() to convert from non-optional to optional and extend() to add the nils where required:

    func longZip_v2(arrayOne:[T], arrayTwo: [U]) -> [(T?, U?)]
    {
        var arrayOneExtended = arrayOne.map({$0 asT?})
        var arrayTwoExtended = arrayTwo.map({$0 asU?})
        
        arrayOneExtended.extend([T?](count: max(0, arrayTwo.count - arrayOne.count), repeatedValue: nil))
        arrayTwoExtended.extend([U?](count: max(0, arrayOne.count - arrayTwo.count), repeatedValue: nil))
        
        returnArray(zip(arrayOneExtended, arrayTwoExtended))
    }

...a new test case is added:

    func testLongZip_v2()
    {
        let resultOne = longZip_v2(arrayOne, arrayTwo)
        
        commonAssertions(resultOne)
    }

Fingers crossed on both hands...

    func testLongZip_v2()
    {
        let resultOne = longZip_v2(arrayOne, arrayTwo)
        
        commonAssertions(resultOne)
    }

Phew!

    Test Case '-[FlexMonkeyExamplesTests.FlexMonkeyExamplesTests testLongZip_v2]' started.
    Test Case '-[FlexMonkeyExamplesTests.FlexMonkeyExamplesTests testLongZip_v2]' passed (0.000 seconds).

Version two was good, but there's duplicated code and variables where I always favour constants. Sadly, the return of map() is immutable, so despite my best efforts, I've been unable to chain map and extend together. However, by moving that common code into a separate function, extendWithNil(), I've gone someway to mitigating that.

extendWithNil() accepts an array and an integer for the desired new length and returns an array of optionals of the input array's type:

    func extendWithNil(array: [T], newCount: Int) -> [T?]

Again, before  writing the code, let's write a test that checks the count and the that the newly added item is nil:

    func testExtendWithNil()
    {
        let array = ["AAA", "BBB"]
        let result = extendWithNil(array, 3)
        
        XCTAssert(resultOne.count == 3, "Count")
        XCTAssertNil(result[2], "Nil Added")
    }

The guts of extendWithNil() are taken from version two of longZip():

    func extendWithNil(array: [T], newCount: Int) -> [T?]
    {
        var returnArray = array.map({$0 asT?})
        
        returnArray.extend([T?](count: max(0, newCount - array.count), repeatedValue: nil))
        
        return returnArray
    }

and finally, version three of longZip() uses extendWithNil() for a pretty tidy implementation:

    func longZip_v3(arrayOne:[T], arrayTwo: [U]) -> [(T?, U?)]
    {
        let newCount = max(arrayOne.count, arrayTwo.count)
        
        let arrayOneExtended = extendWithNil(arrayOne, newCount)
        let arrayTwoExtended = extendWithNil(arrayTwo, newCount)
        
        returnArray(zip(arrayOneExtended, arrayTwoExtended))
    }

Before celebrating with a box of Honeycomb Fingers, a final test:

    Test Case '-[FlexMonkeyExamplesTests.FlexMonkeyExamplesTests testExtendWithNil]' started.
[Optional("AAA"), Optional("BBB"), nil]
    Test Case '-[FlexMonkeyExamplesTests.FlexMonkeyExamplesTests testExtendWithNil]' passed (0.001 seconds).

    Test Case '-[FlexMonkeyExamplesTests.FlexMonkeyExamplesTests testLongZip_v3]' started.
    Test Case '-[FlexMonkeyExamplesTests.FlexMonkeyExamplesTests testLongZip_v3]' passed (0.001 seconds).

I've created a new repository for these little technical examples and you can find all the source code for this post here.


CoreMotion Controlled 3D Sketching on an iPhone with Swift

$
0
0

I was really impressed by a demo of InkScape that I read about in Creative Applications recently. InkScape is an Android app which allows users to sketch in a 3D space that's controlled by the device's accelerometer. It's inspired by Rhonda which pre-dates accelerometers and uses a trackball instead.

Of course, my first thought was, "how can I do this in Swift?". I've never done any work with CoreMotion before, so this was a good opportunity to learn some new stuff. My first port of call was this excellent article on iOS motion at NSHipster.

My plan for the application was to have a SceneKit scene with a motion controlled camera rotating around an offset pivot point at the centre of the SceneKit world. With each touchesBegan(), I'd create a new flat box in the centre of the screen that aligned with the camera and on touchesMoved(), I'd use the touch location to append to a path that I'd draw onto a CAShapeLayer that I'd use as the diffuse material for the newly created geometry. 

Easy! Let's break it down:

Creating the Camera

I wanted the camera at to always point at and rotate around the centre of the world while being slightly offset from it. The two things to help this are the camera's pivot property and using a "look at constraint". First off, I create a node to represent the centre of the world and the camera itself:

    let centreNode = SCNNode()
    centreNode.position = SCNVector3(x: 0, y: 0, z: 0)
    scene.rootNode.addChildNode(centreNode)

    let camera = SCNCamera()
    camera.xFov = 20

    camera.yFov = 20

Next, an SCNLookAtConstraint means that however I translate the camera, it will always point at the centre:

    let constraint = SCNLookAtConstraint(target: centreNode)
    cameraNode.constraints = [constraint]

...and finally, setting the camera's pivot will reposition it but have it rotate around the centre of the world: 

    cameraNode.pivot = SCNMatrix4MakeTranslation(0, 0, -cameraDistance)

Handling iPhone Motion

Next up is handling the iPhone's motion to rotate the camera. Remembering that the iPhone's roll is its rotation along the front-to-back axis and its pitch is its rotation along its side-to-side axis:


...I'll use those properties to control my camera's x and y Euler angles.

The first step is to create an instance of CMMotionManager and ensure it's available and working (so this code won't work on the simulator):

    let motionManager = CMMotionManager()
        
    guardmotionManager.gyroAvailableelse
    {
        fatalError("CMMotionManager not available.")

    }

Next up, I start the motion manager with a little block of code that's invoked with each update. I use a tuple to store the initial attitude of the iPhone and simple use the difference between that initial value and the current attitude to set the camera's Euler angles:

    let queue = NSOperationQueue.mainQueue
    
    motionManager.deviceMotionUpdateInterval = 1 / 30
    
    motionManager.startDeviceMotionUpdatesToQueue(queue())
    {
        (deviceMotionData: CMDeviceMotion?, error: NSError?) in
        
        iflet deviceMotionData = deviceMotionData
        {
            if (self.initialAttitude == nil)
            {
                self.initialAttitude = (deviceMotionData.attitude.roll,
                    deviceMotionData.attitude.pitch)
            }
            
            self.cameraNode.eulerAngles.y = Float(self.initialAttitude!.roll - deviceMotionData.attitude.roll)
            self.cameraNode.eulerAngles.x = Float(self.initialAttitude!.pitch - deviceMotionData.attitude.pitch)
        }

    }

Drawing in 3D

Since I know the angles of my camera, it's pretty simple to align the target geometry for drawing on the touchesBegan() method - it just shares the same attitude:

    currentDrawingNode = SCNNode(geometry: SCNBox(width: 1, height: 1, length: 0, chamferRadius: 0))

    currentDrawingNode.eulerAngles.x = self.cameraNode.eulerAngles.x
    currentDrawingNode.eulerAngles.y = self.cameraNode.eulerAngles.y

At the same time, I create a new CAShapeLayer that will contain a stroked path that follows the user's finger:

    currentDrawingLayer = CAShapeLayer()

    let material = SCNMaterial()

    material.diffuse.contents = currentDrawingLayer
    material.lightingModelName = SCNLightingModelConstant
            

    currentDrawingNode.geometry?.materials = [material]

On touchesMoved(), I need to convert the location in the main view to the location on the geometry. Since this geometry has a size of 1 x 1 (from -0.5 through 0.5 in both directions), I'll need to convert that to coordinates in my CAShapeLayer (arbitrarily set to 512 x 512) to add points its path.   

There are a few steps to do this, taking the locationInView() of the first item in the touches set, I pass it into hitTest()  on my SceneKit scene. This returns an array of SCNHitTestResults for all the geometries underneath the touch which I filter for the current geometry and then simply rescale the result's localCoordinates to find the coordinates on the current CAShapeLayer:

    let locationInView = touches.first?.locationInView(view)

    iflet hitTestResult:SCNHitTestResult = sceneKitView.hitTest(locationInView!, options: nil).filter( { $0.node == currentDrawingNode }).first,
        currentDrawingLayer = currentDrawingLayer

    {
        let drawPath = UIBezierPath(CGPath: currentDrawingLayer.path!)

        let newX = CGFloat((hitTestResult.localCoordinates.x + 0.5) * Float(currentDrawingLayerSize))
        let newY = CGFloat((hitTestResult.localCoordinates.y + 0.5) * Float(currentDrawingLayerSize))
        
        drawPath.addLineToPoint(CGPoint(x: newX, y: newY))
        
        currentDrawingLayer.path = drawPath.CGPath
    }

...and that's kind of it! 

The source code to this project is available here at my GitHub repository. It was developed under Xcode 7 beta 5 and tested on my iPhone 6 running iOS 8.4.1.

A Swift Nixie Tube Display Component

$
0
0


I’m a chap of a certain age who can still remember Nixie Tubes in common use: when I was growing up we had a digital clock that displayed the time with them and, back then, it was the height of technical sophistication. When I stumbled across these assets, I couldn’t resist creating a simple Swift component to display numbers and simple strings in an extremely skeuomorphic, retro style.

My FMNixieDigitDisplaycomponent is super easy to implement: after constructing an instance and adding it to a target view:

    let nixieDigitDisplay = FMNixieDigitDisplay(numberOfDigits: 8)
    view.addSubview(nixieDigitDisplay)

Its intrinsicContentSize can be used for sizing and positing. Here, I centre it on its parent view:

    nixieDigitDisplay.frame = CGRect(
        x: view.frame.width / 2 - nixieDigitDisplay.intrinsicContentSize().width / 2,
        y: view.frame.height / 2 - nixieDigitDisplay.intrinsicContentSize().height / 2,
        width: nixieDigitDisplay.intrinsicContentSize().width,
        height: nixieDigitDisplay.intrinsicContentSize().height)

The component has three setValue functions which support integers, floats or simple strings:

    nixieDigitDisplay.setValue(int: 1234)
    nixieDigitDisplay.setValue(float: 123.456)
    nixieDigitDisplay.setValue(string: "12.34-56")

The only non-numeric characters the display supports are dashes and dots. Any other characters will be displayed as an empty space.

The FMNixieDigitDisplay component contains an array of FMNixieDigitwhich display the individual digits. To get the smooth cross fade as the digit changes, I use UIView.transitionFromView to transition between two UIImageView instances.

For example, when the FMNixieDigit is first created, its useEven Boolean property is set to true and of its two image views evenDigitView and oddDigitView, only oddDigitView has been added to the view. When its value changes, it sets the image property of evenDigitView and executes:

    UIView.transitionFromView(oddDigitView, toView: evenDigitView, duration: 0.5, options: animationOptions, completion: nil)

This code removes oddDigitView from its superview and adds evenDigitView to that same superview with a dissolve. By toggling useEven with each change, I get a smooth transition with each time.

When I first started writing FMNixieDigitDisplay, my only thought was displaying integers, so its setValue(Int) uses the base 10 logarithm of the value to figure out how many characters are required and then iterates that many times, progressively raising it to increasing powers of ten to find the current digit with a modulo 10:

    let numberOfChars = Int(ceil(log10(Double(value))))

    for i in 0 ..< numberOfChars
    {
        let digitValue = floor((Double(value) / pow(10.0, Double(i)))) % 10
        
        nixieDigits[i].value = Int(digitValue)
    }

I then thought it would be nice to support floating point numbers, so added more code break up the value into its integer part of fractional part using modf() and striding backwards through the fractional part:

    for i in (numberOfDigits - numberOfChars - 1).stride(to: 0, by: -1)
    {
        let digitValue = modf(value).1 * pow(10.0, Float(numberOfDigits - numberOfChars - i)) % 10
        
        if i - 1 >= 0
        {
            nixieDigits[i - 1].value = Int(digitValue)
        }
    }

Finally, I decided to add a setValue(String) to display simple strings consisting of numbers, dots and dashes. This iterates of the value’s characters and sets each digit accordingly. With hindsight, both the integer and float implementations of setValue() could have used this technique and kept the code a whole lot simpler. However, I’m quite fond of those first two functions and since this isn’t production code, I’ve kept all the code in.

The demonstration view controller code uses an NSTimer to update an instance of FMNixieDigitDisplay every second with the current time. Here, I break up an NSDate into its component parts and form a string to display the time:

    let date = NSDate()
    let calendar = NSCalendar.currentCalendar()
    let components = calendar.components(
        NSCalendarUnit(rawValue: NSCalendarUnit.Hour.rawValue | NSCalendarUnit.Minute.rawValue | NSCalendarUnit.Second.rawValue),
        fromDate: date)
    let hour = components.hour
    let minute = components.minute
    let second = components.second
    
    print(hour, minute, second)
    
    nixieDigitDisplay.setValue(string: "\(hour).\(minute)-\(second)")


All the code for this component is available at my GitHub repository here. If you plan to use this commercially, please pay attention to the usage notes for the assets here. Enjoy!

Using an iPhone as a 3D Mouse with Multipeer Connectivity in Swift

$
0
0

My recent experiment with CoreMotion, CoreMotion Controlled 3D Sketching on an iPhone with Swift, got me wondering if it would be possible to use an iPhone as a 3D mouse to control another application on a separate device. It turns out that with Apple's Multipeer Connectivity framework, it's not only possible, it's pretty awesome too!

The Multipeer Connectivity framework provides peer to peer communication between iOS devices over Wi-Fi and Bluetooth. As well as allowing devices to send discrete bundles of information, it also supports streaming which is what I need to allow my iPhone to transmit a continuous stream of data describing its attitude (roll, pitch and yaw) in 3D space.

I won't go in the the finer details of the framework, these are explained beautifully in the three main articles I used to get me up to speed:


My single codebase does the job of both the iPad "Rotating Cube" app which displays a cube floating in space and the iPhone "3D Mouse" app which controls the 3D rotation of the cube. As this is more of a proof-of-concept project rather than a piece of production code, everything is in a single view controller, this isn't good architecture, but when rapidly moving between the two "modes", it was super quick to work in.

The iPad "Rotating Cube App"

Apps using Multipeer Connectivity can either advertise a service or browse for a service. In my project, the Rotating Cube App takes the role of the advertiser so my view controller implements the MCNearbyServiceAdvertiserDelegate protocol. After I start advertising:


    func initialiseAdvertising()
    {
        serviceAdvertiser = MCNearbyServiceAdvertiser(peer: peerID, discoveryInfo: nil, serviceType: serviceType)
        
        serviceAdvertiser.delegate = self
        serviceAdvertiser.startAdvertisingPeer()

    }

...the protocol's advertiser() method is invoked when it receives an invitation from a peer. I want to automatically accept it:


    func advertiser(advertiser: MCNearbyServiceAdvertiser, didReceiveInvitationFromPeer peerID: MCPeerID, withContext context: NSData?, invitationHandler: (Bool, MCSession) -> Void)
    {
        invitationHandler(true, self.session)

    }

The iPhone "3D Mouse App"

Since the Rotating Cube App is the advertiser, my 3D Mouse App is the browser. So my monolithic view controller also implements MCNearbyServiceBrowserDelegate and, much like the advertiser, it starts browsing:


    func initialiseBrowsing()
    {
        serviceBrowser = MCNearbyServiceBrowser(peer: peerID, serviceType: serviceType)
        
        serviceBrowser.delegate = self
        serviceBrowser.startBrowsingForPeers()

    }

...and once it's found a peer, it sends that invitation we saw above to join the session:


    func browser(browser: MCNearbyServiceBrowser, foundPeer peerID: MCPeerID, withDiscoveryInfo info: [String : String]?)
    {
        streamTargetPeer = peerID
        
        browser.invitePeer(peerID, toSession: session, withContext: nil, timeout: 120)
        
        displayLink = CADisplayLink(target: self, selector: Selector("step"))
        displayLink?.addToRunLoop(NSRunLoop.mainRunLoop(), forMode: NSDefaultRunLoopMode)

    }

Here's where I also instantiate a CADisplayLink to invoke a step() method with each frame. step() does two things: it uses the streamTargetPeer I defined above to attempt to start a streaming session...


        outputStreamtrysession.startStreamWithName("MotionControlStream", toPeer: streamTargetPeer)
  
        outputStream?.scheduleInRunLoop(NSRunLoop.mainRunLoop(), forMode: NSDefaultRunLoopMode)
        
        outputStream?.open()

...and, if that streaming session is available, sends the iPhone's attitude in 3D space (acquired using CoreMotion) over the stream:


    iflet attitude = attitudewhere outputStream.hasSpaceAvailable
    {
        self.label.text = "stream: \(attitude.roll.radiansToDegrees()) | \(attitude.pitch.radiansToDegrees()) | \(attitude.yaw.radiansToDegrees())"
        
        outputStream.write(attitude.toBytes(), maxLength: 12)

    }

Serialising and Deserialising Float Values

The attitude (of type MotionControllerAttitude) struct contains three float values for roll, pitch and yaw, but the stream only supports UInt8 bytes. To serialise and deserialise that data, I found these two functions by Rintaro on StackOverflow that take any type and convert to and from arrays of UInt8:


    func fromByteArray(value: [UInt8], _: T.Type) -> T {
        return value.withUnsafeBufferPointer {
            returnUnsafePointer<T>($0.baseAddress).memory
        }
    }

    func toByteArray(var value: T) -> [UInt8] {
        returnwithUnsafePointer(&value) {
            Array(UnsafeBufferPointer(start: UnsafePointer<UInt8>($0), count: sizeof(T)))
        }

    }

My MotionControllerAttitude struct has a toBytes() method that uses toByteArray() with flatMap() to create an array of UInt8 that the outputStream.write can use:


    func toBytes() -> [UInt8]
    {
        let composite = [roll, pitch, yaw]
        
        return composite.flatMap(){toByteArray($0)}

    }

...and, conversely, also has an init() to instantiate an instance of itself from an array of UInt8 using fromByteArray():


    init(fromBytes: [UInt8])
    {
        roll = fromByteArray(Array(fromBytes[0...3]), Float.self)
        pitch = fromByteArray(Array(fromBytes[4...7]), Float.self)
        yaw = fromByteArray(Array(fromBytes[8...11]), Float.self)

    }

This is pretty brittle code - again, this is just a proof of concept!

Rotating the Cube

Back in the Rotating Cube App, because the view controller is also acting as the NSStreamDelegate for the steam (you can see now things are yearning to be refactored!), the stream() method is invoked when the iPad receives a packet of data.

I need to check the incoming stream is actually a NSInputStream and it has bytes available. If it is and it does, I use the code above to create a MotionControllerAttitude instance from the incoming data and simply set the Euler angles on my cube:

    func stream(stream: NSStream, handleEvent eventCode: NSStreamEvent)
    {
        iflet inputStream = stream as? NSInputStreamwhere eventCode == NSStreamEvent.HasBytesAvailable
        {
            var bytes = [UInt8](count:12, repeatedValue: 0)
            inputStream.read(&bytes, maxLength: 12)

            let streamedAttitude = MotionControllerAttitude(fromBytes: bytes)
            
            dispatch_async(dispatch_get_main_queue())
            {
                self.label.text = "stream in: \(streamedAttitude.roll.radiansToDegrees()) | \(streamedAttitude.pitch.radiansToDegrees()) | \(streamedAttitude.yaw.radiansToDegrees())"
                
                self.geometryNode?.eulerAngles = SCNVector3(x: -streamedAttitude.pitch, y: streamedAttitude.yaw, z: streamedAttitude.roll)
            
            }
        }
    }

In Conclusion

This project demonstrates the power of Multipeer Connectivity: whether you're creating games or content creation apps, multiple iOS devices can work together and stream any type of data quickly and reliably. Conceivably, a roomful of iPads could be all hooked up as peers and act as a render farm or a huge single multi-device display.

As always, the source code for this project is available at my GitHub repository here.

I haven't covered the CoreMotion code, this is all discussed in CoreMotion Controlled  3D sketching on an iPhone with Swift.


A Swift Node Based User Interface Component for iOS

$
0
0

With the exciting news about Apple's new iPad Pro and the new Core Image filters in iOS 9 (some powered by Metal Performance Shaders!), now is a perfect time for me to start working on version 3 of my node based image processing application, Nodality

I started writing the Swift version of Nodality when I was a little wet behind the ears and, to be frank, to get it working nicely under Swift 2 it could benefit from a total rewrite. The node based user interface part of the code is very tightly coupled with the image filtering logic and would be impossible to reuse for another type of application. 

So, with that in mind, I've rebuilt that code to totally separate the display logic from the image handling and opened it up to accept injectable renderers. This means my node based UI component, ShinpuruNodeUI, can be easily reused in another type of application. For example, it could render database schemas, business process workflows or even audio devices and filters.

This post looks at how you could implement ShinpuruNodeUI in your own app rather than discussing the internals of the component itself. If you have any questions about the actual component, please feel free to comment on this post or reach out to me via Twitter where I am @FlexMonkey.

The project comes bundled with a simple demonstration calculator app which has been my default "getting started" app for node based user interfaces since I first started coding them back in 2008! The calculator code illustrates how you could implement your own business logic in a node based application.

Interaction Design

The main user gestures are:

  • To create a new node, long press on the background
  • To toggle a relationship between two nodes
    • Long press the source node until the background colour changes to light grey
    • The component is now in "relationship creation mode"
    • Tap an input (light grey row) on a target and the relationship is created (or removed if that relationship exists)
  • To remove a node, tap the little trash-can icon in the node toolbar
  • The entire canvas can be zoomed and panned 
I've played with a more traditional drag gesture to create relationships, but found this "relationship creation mode" pattern worked well for touch devices. In this release, there's nothing preventing users from creating circular relationships which cause the app to crash -  there's a fix for this pending. 

Installation

ShinpuruNodeUI is manually installed and requires you to copy the following files into your project:

  • SNNodeWidgetA node widget display component
  • SNNodesContainerThe superview to the node widgets and background grid
  • SNRelationshipCurvesLayerThe CAShapeLayer that renders the relationship curves
  • SNViewThe main ShinpuruNodeUI component 
  • ShinpuruNodeDataTypesContains supporting classes and protocols: 
    • SNNode A node data type
    • SNDelegate The delegate protocol 
    • SNItemRenderer, SNOutputRowRenderer, SNInputRowRenderer base classes for renderers that you can extend for your own implementation 
This is bound to change as the component evolves and I'll keep the read-me file updated.

Instantiating the Component

Set up is pretty simple. Instantiate an instance:

    let shinpuruNodeUI = SNView()

Add it as a subview:

    view.addSubview(shinpuruNodeUI)

...and set its bounds:

    shinpuruNodeUI.frame = CGRect(x: 0,
        y: topLayoutGuide.length,
        width: view.frame.width,

        height: view.frame.height - topLayoutGuide.length)

An Overview of SNDelegate

For ShinpuruNodeUI to do anything interesting, it needs a nodeDelegate which is of type SNDelegate. The nodeDelegate is responsible for everything from acting as a datasource to providing renderers and includes these methods:

  • dataProviderForView(view: SNView) -> [SNNode]? returns an array of SNNode instances
  • itemRendererForView(view: SNView, node: SNNode) -> SNItemRenderer returns the main item renderer for the view. In my demo app, these are the red and blue squares that display the value of the node.
  • inputRowRendererForView(view: SNView, node: SNNode, index: Int) -> SNInputRowRenderer returns the renderer for the input rows. In my demo app, these are the light grey rows that display the value of an input node.
  • outputRowRendererForView(view: SNView, node: SNNode) -> SNOutputRowRenderer returns the renderer for the output row. In my demo app, this is the dark grey row at the bottom of the node widget.
  • nodeSelectedInView(view: SNView, node: SNNode?) this method is invoked when the user selects a node. In my demo app, it's when I update the controls in the bottom toolbar.
  • nodeMovedInView(view: SNView, node: SNNodethis method is invoked when a node is moved. This may be an opportunity to save state.
  • nodeCreatedInView(view: SNView, position: CGPointthis method is invoked when the user long-presses on the background to create a new node. ShinpuruNodeUI isn't responsible for updating the nodes data provider, so this is an opportunity to add a new node to your array.
  • nodeDeletedInView(view: SNView, node: SNNodethis method is invoked when the user clicks the trash-can icon. Again, because ShinpuruNodeUI is purely responsible for presentation, this is the time to remove that node from your model and recalculate other node values as required. 
  • relationshipToggledInView(view: SNView, sourceNode: SNNode, targetNode: SNNode, targetNodeInputIndex: Intthis method is invoked when the user toggles a relationship between two views and, much like deleting a node, you'll need to recalculate the values of affected nodes.
  • defaultNodeSize(view: SNView) -> CGSize returns the size of a newly created node widget to ensure new node widgets are nicely positioned under the user's finger (or maybe Apple Pencil)

In my demo app, its the view controller that acts as the nodeDelegate.

So, although ShinpuruNodeUI renders your nodes and their relationships and reports back user gestures, there's still a fair amount that the host application is responsible for. Luckily, my demo app includes basic implementations of everything required to get you up and running.

Renderers


Node widgets requires three different types of renderers, defined by the SNDelegate above. My demo project includes basic implementations of all three in the DemoRenderers file. 

The three renderers should sub class SNItemRenderer, SNOutputRowRendererSNInputRowRenderer and, at the very least,  implement a reload() method and override intrinsicContentSize()reload() is invoked when ShinpuruNodeUI needs the renderer to update itself (in the case of the demo app, this is generally just updating the text property of a label.

Implementing a Calculator Application 

My demo calculator app contains a single struct, DemoModel, which manages the logic for updating its nodes when values or inter-node relationships are changed. The view controller mediates between an instance of DemoModel and an instance of ShinpuruNodeUI. 

When a numeric (red) node is selected and its value changed by the slider in the bottom toolbar, the view controller's sliderChangeHandler() is invoked. This method double checks that ShinpuruNodeUI has a selected node, updates that node's value and then calls the DemoModel's updateDescendantNodes() method. updateDescendantNodes() returns an array of all the nodes affected by this update which are then passed back to ShinpuruNodeUI to update the user interface:

    func sliderChangeHandler()
    {
        iflet selectedNode = shinpuruNodeUI.selectedNode?.demoNodewhere selectedNode.type == .Numeric
        {
            selectedNode.value = DemoNodeValue.Number(round(slider.value))
            
            demoModel.updateDescendantNodes(selectedNode).forEach{ shinpuruNodeUI.reloadNode($0) }
        }

    }

Similarly, when a blue operator node (i.e. add, subtract, multiply or divide) is selected and the operator is changed, the selected node's type is changed and updateDescendantNodes() is executed followed by reloading the affected nodes:

    func operatorsControlChangeHandler()
    {
        iflet selectedNode = shinpuruNodeUI.selectedNode?.demoNodewhere selectedNode.type.isOperator
        {
            selectedNode.type = DemoNodeType.operators[operatorsControl.selectedSegmentIndex]
            
            demoModel.updateDescendantNodes(selectedNode).forEach{ shinpuruNodeUI.reloadNode($0) }
        }

    }

ShinpuruNodeUI can invoke delegate methods that will require DemoModel to update its nodes - specifically, deleting a node or changing a relationship. To that end, both DemoModel's deleteNode() and relationshipToggledInView() return an array of affected nodes which are passed back to ShinpuruNodeUI:

    func nodeDeletedInView(view: SNView, node: SNNode)
    {
        iflet node = node as? DemoNode
        {
            demoModel.deleteNode(node).forEach{ view.reloadNode($0) }
            
            view.renderRelationships()
        }
    }
    
    func relationshipToggledInView(view: SNView, sourceNode: SNNode, targetNode: SNNode, targetNodeInputIndex: Int)
    {
        iflet targetNode = targetNode as? DemoNode,
            sourceNode = sourceNode as? DemoNode
        {
            demoModel.toggleRelationship(sourceNode, targetNode: targetNode, targetIndex: targetNodeInputIndex).forEach{ view.reloadNode($0) }
        }

    }

Conclusion

ShinpuruNodeUI is still evolving, but is in a state where it can provide the basis for an iOS node based application for a wide variety of use cases. It offers a clear separation of concerns between the presentation of the node relationships, the presentation of the actual data and the computation. 

The complete project is available at my GitHub repository here. Keep an eye out on my blog or on Twitter for an updates!


Advanced Touch Handling in iOS9: Coalescing and Prediction

$
0
0


With the introduction of the iPad Pro, low latency, high resolution touch handling has become more important than ever. Even if your app runs smoothly at 60 frames per second, high-end iOS devices have a touch scan rate of 120 hertz and with the standard out-of-the-box touch handling, you could easily miss half of your user’s touch movements.

Luckily, with iOS 9, Apple have introduced some new functionality to UIEvent to reduce touch latency and improve temporal resolution. There's a demo application to go with with post that you can find at my GitHub repository here.

Touch Coalescing

The first feature is touch coalescing. If your app is sampling touches with an overridden touchesMoved(), the most amount of touch samples you’ll get is 60 per second and, if your app is concerning itself with some fancy calculations on the main thread, it could well be less than that.

Touch coalescing allows you to access all the intermediate touches that may have occurred between touchesMoved() invocations.  This allows, for example, your app to draw a smooth curve consisting of half a dozen points when you’ve only received one UIEvent.

The syntax is super simple. In my demo application, I have a few CALayers that I draw upon. The first layer (mainDrawLayer, which contains chubby blue lines) is drawn on using information from the main UIEvent from touchesMoved():

    overridefunc touchesMoved(touches: Set<UITouch>, withEvent event: UIEvent?)
    {
        super.touchesMoved(touches, withEvent: event)
        
        guardlet touch = touches.first, event = event else
        {
            return
        }
        
        mainDrawPath.addLineToPoint(touch.locationInView(view))
        mainDrawLayer.path = mainDrawPath.CGPath
        [...]

If the user moves their finger across the screen fast enough, they’ll get a jagged line, which is probably not what they want. To access the intermediate touches, I use the coalescedTouchesForTouch method of the event which returns an array of UITouch:

        [...]
        iflet coalescedTouches = event.coalescedTouchesForTouch(touch)
        {
            print("coalescedTouches:", coalescedTouches.count)
            
            for coalescedTouch in coalescedTouches
            {
                coalescedDrawPath.addLineToPoint(coalescedTouch.locationInView(view))
            }
            
            coalescedDrawLayer.path = coalescedDrawPath.CGPath
        }
        [...]

Here, I loop over those touches (I trace the number of touches to the console for information) and create a thinner yellow line by drawing on coalescedDrawLayer as an overlay.  I’ve added a horrible loop to the touchesMoved method to slow things down a bit:

        var foo = Double(1)
        
        for bar in 0 ... 1_000_000
        {
            foo += sqrt(Double(bar))
        }

If you run this app on your iOS 9 device and scribble away you can see the two results: a jagged thick blue line and a beautifully smooth thinner yellow line based on all those intermediate touch events that could have been missed.

Predictive Touch

Something maybe even cleverer is touch prediction which allows you to preempt where a user’s finger (or Apple Pencil) may be in the near future. Predictive touch uses some highly tuned algorithms and is continually updated with where iOS expects the users touch to be in approximately a frame in the future. This means you could begin preparing user interface components (e.g. begin a fade in) before they’re actually required to help reduce latency.

In my demo application, I display the predicted touch as a grey circle. The syntax is not dissimilar to that of coalesced touch: the event has a new method, predictedTouchesForTouch(), which returns an an array of UITouch:

        [...]
        iflet predictedTouches = event.predictedTouchesForTouch(touch)
        {
            print("predictedTouches:", predictedTouches.count)
            
            for predictedTouch in predictedTouches
            {
                let locationInView =  predictedTouch.locationInView(view)
                
                let circle = UIBezierPath(ovalInRect: CGRect(x: locationInView.x - 4, y: locationInView.y - 4, width: 8, height: 8))
                
                predictedDrawPath.appendPath(circle)
            }
            
            predictedDrawLayer.path = predictedDrawPath.CGPath
        }
        [...]

You can see a few grey circles in the screen grab above which show two touches iOS predicted I would do to complete the spiral - that I never actually did! Spooky!

Conclusion

As users demand less latency and a higher touch resolution, touch coalescing and prediction allow our apps to support that. Whatever the framerate of our apps, we can respond to all of the user’s gestures and even preempt some of them!

The source code for this demo app is available at my GitHub repository here.

Addendum 


I've updated this project to better illustrate the differences between regular, coalesced and predicted touches. The regular and coalesced touches display small circles at each vertex which better illustrates to increased resolution of the coalesced touches.  Predicted touches are small white dots with a tail that originates from their predictor event.


Applying Gaussian Blur to UIViews with Swift Protocol Extensions

$
0
0

Here's a fun little experiment showing the power of Swift's Protocol Extensions to apply a CIGaussianBlur Core Image filter to any UIView with no developer overhead. The code could be extended to apply any Core Image filter such as a half tone screen or colour adjustment.

Blurable is a simple protocol that borrows some of the methods and variables from a UIView:

    var layer: CALayer { get }
    var subviews: [UIView] { get }
    var frame: CGRect { get }
    
    func addSubview(view: UIView)

    func bringSubviewToFront(view: UIView)

...and adds a few of its own:

    func blur(blurRadius blurRadius: CGFloat)
    func unBlur()
    

    var isBlurred: Bool { get }

Obviously, just being a protocol, it doesn't do much on its own. However, by adding an extension, I can introduce default functionality. Furthermore, by extending UIView to implement Blurable, every component from a segmented control to a horizontal slider can be blurred:

    extensionUIView: Blurable
    {

    }

The Mechanics of Blurable

Getting a blurred representation of a UIView is pretty simple: I need to begin an image context, use the view's layer's renderInContext method to render into the context and then get a UIImage from the context:

    UIGraphicsBeginImageContextWithOptions(CGSize(width: frame.width, height: frame.height), false, 1)
    
    layer.renderInContext(UIGraphicsGetCurrentContext()!)
    
    let image = UIGraphicsGetImageFromCurrentImageContext()


    UIGraphicsEndImageContext();

Once I have the image populated, it's a fairly standard workflow to apply a Gaussian blur to it:

    guardlet blur = CIFilter(name: "CIGaussianBlur") else
    {
        return
    }

    blur.setValue(CIImage(image: image), forKey: kCIInputImageKey)
    blur.setValue(blurRadius, forKey: kCIInputRadiusKey)
    
    let ciContext  = CIContext(options: nil)
    
    let result = blur.valueForKey(kCIOutputImageKey) as! CIImage!
    
    let boundingRect = CGRect(x: -blurRadius * 4,
        y: -blurRadius * 4,
        width: frame.width + (blurRadius * 8),
        height: frame.height + (blurRadius * 8))
    
    let cgImage = ciContext.createCGImage(result, fromRect: boundingRect)


    let filteredImage = UIImage(CGImage: cgImage)

A blurred image will be larger than its input image, so I need to be explicit about the size I require in createCGImage.

The next step is to add a UIImageView to my view and hide all the other views. I've subclassed UIImageView to BlurOverlay so that when it comes to removing it, I can be sure I'm not removing an existing UIImageView

    let blurOverlay = BlurOverlay()
    blurOverlay.frame = boundingRect
    
    blurOverlay.image = filteredImage
    
    subviews.forEach{ $0.hidden = true }
    

    addSubview(blurOverlay)

When it comes to de-blurring, I want to ensure the last subview is one of my BlurOverlay  remove it and unhide the existing views:

    func unBlur()
    {
        iflet blurOverlay = subviews.lastas? BlurOverlay
        {
            blurOverlay.removeFromSuperview()
            
            subviews.forEach{ $0.hidden = false }
        }

    }

Finally, to see if a UIView is currently blurred, I just need to see if its last subview is a BlurOverlay:

    var isBlurred: Bool
    {
        returnsubviews.lastisBlurOverlay
    }

Blurring a UIView

To blur and de-blur, just invoke blur() and unBlur() on an UIView:

    segmentedControl.unBlur()
    segmentedControl.blur(blurRadius: 2)

Source Code

As always, the source code for this project is available at my GitHub repository here. Enjoy!


A First Look at Metal Performance on the iPhone 6s

$
0
0

TL;DR The 6s runs my Metal particles app approximately 3 times faster than the 6 and can calculate and render 8,000,000 particles at 30 frames per second!

My shiny new iPhone 6s has just arrived and, of course, the first thing I did was run up my Swift and Metal GPU particle system app, ParticleLab. The performance jump from my trusty old 6 is pretty impressive!

With 4,000,000 particles, the 6 runs at around 20 frames per second, while the 6s hovers at  around 60 frames per second. With 8,000,000 particles, the 6 runs at an unusable 10 frames per second while the 6s manages a not too shabby 30 frames per second. 

Comparing the same application on my iPad Air 2 is a little unfair because the iPad has more pixels to handle, but the iPhone 6s runs the demos about 50% faster.

It took two minutes to update my multiple touch demo to support 3D Touch. UITouch objects now have a force and maximumPossibleForce properties. If your device doesn't support 3D Touch, the value both will be zero (you can also check traitCollection.forceTouchCapability == .Available), so my code caters for both classes with a simple ternary to calculate a touchMultiplier constant:


    let currentTouchesArray = Array(currentTouches)
    
    for (i, currentTouch) in currentTouchesArray.enumerate() where i < 4
    {
        let touchMultiplier = currentTouch.force == 0 && currentTouch.maximumPossibleForce == 0
            ? 1
            : Float(currentTouch.force / currentTouch.maximumPossibleForce)
        
        particleLab.setGravityWellProperties(gravityWellIndex: i,
            normalisedPositionX: Float(currentTouch.locationInView(view).x / view.frame.width) ,
            normalisedPositionY: Float(currentTouch.locationInView(view).y / view.frame.height),
            mass: 40 * touchMultiplier,
            spin: 20 * touchMultiplier)
    }

Easy! 

You can try for yourself - the source code for ParticleLab is available in my GitHub repository.

3D Touch in Swift: Implementing Peek & Pop

$
0
0

One of my favourite features on the iPhone 6s is the new 3D Touch Peek and Pop. Peek and Pop relies on pressure sensitivity to offer the user a transient preview pop up with a press (peek) or allows them to navigate that item with a deeper press (pop). Both give a satisfying haptic click and peeking can also display a set of context sensitive preview actions.

It so happens that over the last week or so, I've been updating my PHImageManager based photo browser. This is a project I started back in January and I wanted to update to Swift 2 to include in the next version of Nodality. Although Nodality is an iPad application, the component is universal and is the perfect candidate for my first foray into Peek and Pop.

Interaction Design

For non 3D Touch devices, my photo browser's interaction design is pretty simple, the top segmented control allows the user to navigate between their collections and touching an image selects it and returns control back the the host application. With a long press, the user can toggle the favourite status of an item via a UIAlertController.

For 3D Touch devices, the user can click on an image to pop up a peek preview and then toggle the favourite status via a UIPreviewAction. A deeper pop selects an image and returns control to the host application.

Setting Up

I don't want to lose the long press functionality for non 3D Touch devices, so during initialisation, I look at the traitCollection to either register the photo browser for peek previewing or implement a long press gesture recogniser. Because the component itself is modally presented, its traitCollection claims not to be force touch enabled, so I look at the traitCollection of the application's key window:

    ifUIApplication.sharedApplication().keyWindow?.traitCollection.forceTouchCapability == UIForceTouchCapability.Available
    {
        registerForPreviewingWithDelegate(self, sourceView: view)
    }
    else
    {
        let longPress = UILongPressGestureRecognizer(target: self, action: "longPressHandler:")
        collectionViewWidget.addGestureRecognizer(longPress)

    }

Peeking

To register the photo browser for previewing with delegate, it must implement UIViewControllerPreviewingDelegate and for peeking, previewingContext(viewControllerForLocation) is called. Here I simply need to return an instance of the view controller I want to act as the preview. When the user touched an image, I instantiated a tuple named touchedCell of type (UICollectionViewCellNSIndexPath) that refers to the touched image and with that I can get the PHAsset required for previewing and hand it to my PeekViewController:

    func previewingContext(previewingContext: UIViewControllerPreviewing,
        viewControllerForLocation location: CGPoint) -> UIViewController?
    {
        guardlet touchedCell = touchedCell,
            asset = assets[touchedCell.indexPath.row] as? PHAssetelse
        {
            returnnil
        }
        
        let previewSize = min(view.frame.width, view.frame.height) * 0.8
        
        let peekController = PeekViewController(frame: CGRect(x: 0, y: 0,
            width: previewSize,
            height: previewSize))

        peekController.asset = asset
        
        return peekController

    }

The previewing view controller, PeekViewController, reuses ImageItemRenderer - the same item renderer as my main UICollectionView, so all the code for requesting a thumbnail sized image was already available:

    class PeekViewController: UIViewController
    {
        let itemRenderer: ImageItemRenderer
        
        requiredinit(frame: CGRect)
        {
            itemRenderer = ImageItemRenderer(frame: frame)
            
            super.init(nibName: nil, bundle: nil)
            
            preferredContentSize = frame.size
            
            view.addSubview(itemRenderer)
        }

        var asset: PHAsset?
        {
            didSet
            {
                iflet asset = asset
                {
                    itemRenderer.asset = asset;
                }
            }
        }

    }

Adding the preview action to toggle the favourite status of the asset it a simple as returning an array of UIPreviewActionItemPeekViewController already knows what asset needs to be toggled and the shared photo library is a singleton, so the code is just:

    var previewActions: [UIPreviewActionItem]
    {
        return [UIPreviewAction(title: asset!.favorite ? "Remove Favourite" : "Make Favourite",
            style: UIPreviewActionStyle.Default,
            handler:
            {
                (previewAction, viewController) in (viewController as? PeekViewController)?.toggleFavourite()
            })]
    }
    
    func toggleFavourite()
    {
        iflet targetEntity = asset
        {
            PHPhotoLibrary.sharedPhotoLibrary().performChanges(
                {
                    let changeRequest = PHAssetChangeRequest(forAsset: targetEntity)
                    changeRequest.favorite = !targetEntity.favorite
                },
                completionHandler: nil)
        }

    }

The final result, with very little code, is a fully functioning "peek" with the nice system animation and that satisfying haptic click:

Popping

Popping is easier still. Here, I implement the previewingContext(commitViewController) method of UIViewControllerPreviewingDelegate. My photo browser has a method named requestImageForAsset() which requests the image for an asset and then dismisses the browser, so I simply invoke that:

    func previewingContext(previewingContext: UIViewControllerPreviewing,
        commitViewController viewControllerToCommit: UIViewController)
    {
        guardlet touchedCell = touchedCell,
            asset = assets[touchedCell.indexPath.row] as? PHAssetelse
        {
            dismissViewControllerAnimated(true, completion: nil)
            
            return
        }
        
        requestImageForAsset(asset)
    }

Conclusion

I've only had my phone for a matter of hours and already I find peeking and popping a very natural way of interacting with it. Considering the simplicity with which peek and pop can be implemented, I'd humbly suggest that adding it to your own applications is a pretty big win!

As always, the source code for this project is available at my GitHub repository here. Enjoy!


ChromaTouch: a 3D Touch Colour Picker in Swift

$
0
0

If you're fairly new to Swift, you may have found my last post on 3D Touch a little daunting. Here's a much smaller project that may be a little easier to follow to get up and running with force, peek, pop and preview actions. 

ChromaTouch is a HSL based colour picker where the user can set the colour with three horizontal sliders or by touching over a colour swatch where horizontal movement sets hue, vertical set saturation and the force of the touch sets the lightness of the colour. As the user moves their finger over the swatch, the sliders update to reflect the new HSL values.

By force touching the sliders, the user is presented with a small preview displaying the RGB hex value of their colour:


By swiping up they can set their colour to one of three presets:


And by deep pressing, they're presented with a full screen preview of their colour which is dismissed with a tap:


Let's look at each part of the 3D Touch code to see how everything has been implemented.

Setting Lightness with Force 

My Swatch class is responsible for handling the user's touches in three dimensions and populating a tuple containing the three values for hue, saturation and lightness. Each touch returned in touchesMoved() contains two dimensional spatial data in its touchLocation property and the amount of force the user is exerting in its force property. 

We can normalise these values to between zero and one by dividing the positions by the bounds of the Swatch's view and the force by the maximumPossibleForce. With those normalised values, we can construct an object representing the three properties of our desired colour:

    overridefunc touchesMoved(touches: Set<UITouch>, withEvent event: UIEvent?)
    {
        super.touchesMoved(touches, withEvent: event)

        guardlet touch = touches.firstelse
        {
            return
        }
        
        let touchLocation = touch.locationInView(self)
        let force = touch.force
        let maximumPossibleForce = touch.maximumPossibleForce

        let normalisedXPosition = touchLocation.x / frame.width
        let normalisedYPosition = touchLocation.y / frame.height
        let normalisedZPosition = force / maximumPossibleForce
        
        hsl = HSL(hue: normalisedXPosition,
            saturation: normalisedYPosition,
            lightness: normalisedZPosition)
    }

If you look at my code, you'll notice I keep a variable holding the previous touch force and compare it against the current touch force. This allows me to ignore large differences which happen when the user lifts their finger to end the gesture.

Peeking

Peeking happens when the user presses down on the sliders. In my main view controller, as I create each of the three sliders, I register them for previewing with that main view controller:

    for sliderWidget in [hueSlider, saturationSlider, lightnessSlider]
    {
        progressBarsStackView.addArrangedSubview(sliderWidget)
        sliderWidget.addTarget(self, action: "sliderChangeHandler", forControlEvents: UIControlEvents.ValueChanged)
        
        registerForPreviewingWithDelegate(self, sourceView: sliderWidget)
    }

My view controller needs to implement UIViewControllerPreviewingDelegate in order to tell iOS what to pop up when the user wishes to preview. In the case of ChromaTouch, it's a PeekViewController and it's defined in previewingContext(viewControllerForLocation):

    func previewingContext(previewingContext: UIViewControllerPreviewing,
        viewControllerForLocation location: CGPoint) -> UIViewController?
    {
        let peek = PeekViewController(hsl: hsl,
            delegate: previewingContext.delegate)
        
        return peek
    }

PeekViewController is pretty basic, containing a UILabel that has its text set based on an extension I wrote to extract the RGB components from a UIColor.

Preview Actions

By swiping up on the preview, the user can set their colour to a preset. This is super simple to implement: all my PeekViewController needs to do is return an array of UIPreviewActionItem which I create based on an array of predefined colour enumerations:

    var previewActions: [UIPreviewActionItem]
    {
        return [ColorPresets.Red, ColorPresets.Green, ColorPresets.Blue].map
        {
            UIPreviewAction(title: $0.rawValue,
                style: UIPreviewActionStyle.Default,
                handler:
                {
                    (previewAction, viewController) in
                    (viewController as? PeekViewController)?.updateColor(previewAction)
                })
        }
    }

Because I passed the main view controller in the constructor of PeekViewController as delegate, the updateColor() method in the PeekViewController can pass a newly constructed HSL tuple to it based on the colour selected as a preview action:

    func updateColor(previewAction: UIPreviewActionItem)
    {
        guardlet delegate = delegateas? ChromaTouchViewController,
            preset = ColorPresets(rawValue: previewAction.title) else
        {
            return
        }
        
        let hue: CGFloat
        
        switch preset
        {
        case .Blue:
            hue = 0.667
        case .Green:
            hue = 0.333
        case .Red:
            hue = 0
        }
        
        delegate.hsl = HSL(hue: hue, saturation: 1, lightness: 1)
    }

Popping

The final step is popping: when the user presses deeply on the preview, the preview will vanish (this is managed by the framework) and the main view controller is shown again. However, here I want to hide the sliders and make the swatch full screen. Once the user taps, I want the screen to return to its default state.

Popping requires the second method from UIViewControllerPreviewingDelegatepreviewingContext(commitViewController). Here, I simply turn off user interaction on the swatch and hide the stack view containing the three sliders:

    func previewingContext(previewingContext: UIViewControllerPreviewing,
        commitViewController viewControllerToCommit: UIViewController)
    {
        swatch.userInteractionEnabled = false
        progressBarsStackView.hidden = true
    }

To respond to the tap to return the user interface back to default, ChromaTouchViewController reenables user interaction on the swatch and unhides the progress bars:

    overridefunc touchesBegan(touches: Set<UITouch>, withEvent event: UIEvent?)
    {
        super.touchesBegan(touches, withEvent: event)
        
        swatch.userInteractionEnabled = true
  
        UIView.animateWithDuration(0.25){ self.progressBarsStackView.hidden = false }
    }

Conclusion

I'm beginning to really love peek and pop in the day-to-day iOS apps. As I mentioned in my previous post and as hopefully demonstrated here, it's super easy to implement.

All the code for this project is available in my GitHub repository here. Enjoy!

Just For Fun...


Finally, I couldn't resist taking my old Core Image filtering live video project and having a CIBumpFilter controlled by 3D Touch. Here, the force controls the bump filter's scale the branch for this silliness is right here.


Rotatable: A Swift Protocol Extension to Rotate any UIView

$
0
0


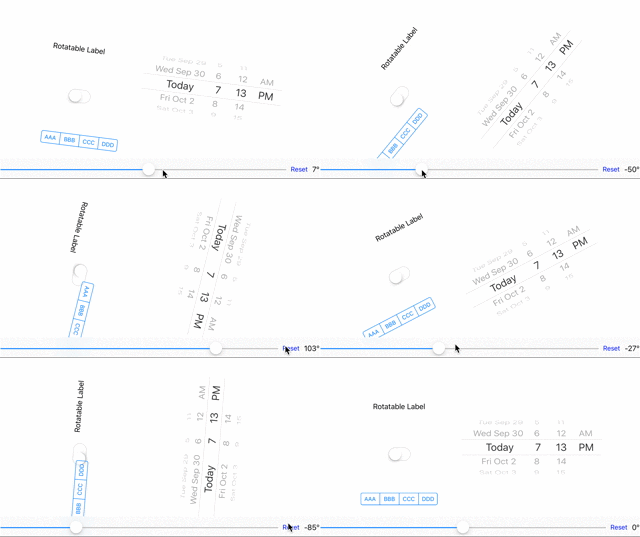
One of the questions frequently asked on StackOverflow is “how do I rotate my UILabel / UIButton / UISlider etc.”. So, following on from Blurable, my Swift protocol extension for applying a Gaussian blur to UIViews, I thought I’d create another quick extension to make any UIView rotatable

By default, UIViews don’t have a simple rotation property. To rotate them, you have to create a CGAffineTransform and pass it to the view’s transform property. If your user interface requires lots of rotating, Rotatable bundles all that up into a separate extension and lets you forget about the implementation details.

The Rotatable Protocol

The protocol itself is pretty basic, consisting of one property, transform of type CGAffineTransform, which UIViews already have, two new methods for actually rotating:

    mutatingfunc rotate(degrees degrees: CGFloat, animated: Bool)
    mutatingfunc rotate(radians radians: CGFloat, animated: Bool)

…and a readonly property that returns a tuple of the UIView’s current rotation in both radians and degrees:

    var rotation: (radians: CGFloat, degrees: CGFloat) { get }

Rotatable Mechanics

The protocol extension contains the mechanics for rotating the component. It’s pretty basic stuff, simply creating a CGAffineTransformMakeRotation and  applying it to the transform property, If the rotate() method is called with animated set to true, it wraps setting in a UIView.animateWithDuration:

    mutatingfunc rotate(radians radians: CGFloat, animated: Bool = false)
    {
        if animated
        {
            UIView.animateWithDuration(0.2)
            {
                self.transform = CGAffineTransformMakeRotation(radians)
            }
        }
        else
        {
            transform = CGAffineTransformMakeRotation(radians)
        }
    }

To return the current rotation, I extract the angle from the CGAffineTransform:

    var rotation: (radians: CGFloat, degrees: CGFloat)
    {
        let radians = CGFloat(atan2f(Float(transform.b), Float(transform.a)))
        
        return (radians, radiansToDegrees(radians))
    }

Implementation

All the code for Rotatable is in one file, Rotatable.swift. To rotate an object, let’s say a date picker, all you have to do is invoke the rotate() method:

    var datePicker = UIDatePicker()
    view.addSubview(datePicker)

    datePicker.rotate(degrees: 45)

If you’re resetting the rotation, you may want to animate it, in which case the syntax would be:

    datePicker.rotate(radians: 0, animated: true)

By default, the animated property is set to false.

One little caveat - Rotatable doesn't work too well in a UIStackView, all the examples in my demo are absolutely positioned. 

Conclusion

Hopefully, this projects is another good demonstration of how Swift’s protocol extensions allow developers to retroactively add almost any type of behaviour to all objects in Swift, including visual components, with a minimum of effort.


All the code to this project is available in my GitHub repository here.

DeepPressGestureRecognizer - A 3D Touch Custom Gesture Recogniser in Swift

$
0
0


Back in March, I looked at creating custom gesture recognisers for a single touch rotation in Creating Custom Gesture Recognisers in Swift. With the introduction of 3D Touch in the new iPhone 6s, I thought it would be an interesting exercise to do the same for deep presses. 

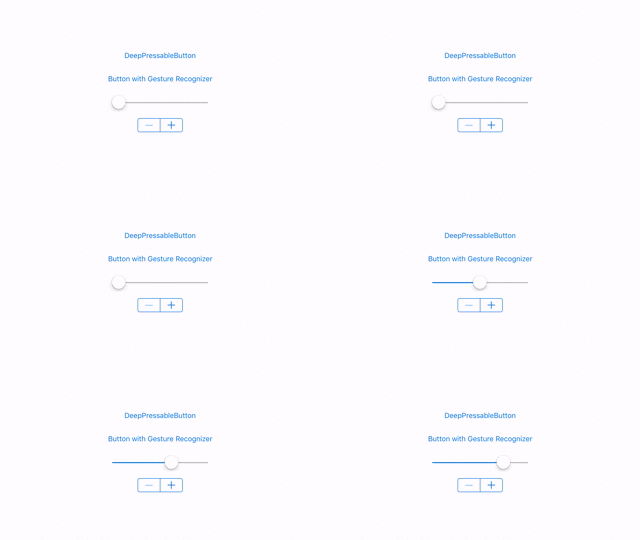
My DeepPressGestureRecognizer is an extended UIGestureRecognizer that invokes an action when the press passes a given threshold. Its syntax is the same as any other gesture recogniser, such as long press, and is implemented like so:

    let button = UIButton(type: UIButtonType.System)
    
    button.setTitle("Button with Gesture Recognizer", forState: UIControlState.Normal)

    stackView.addArrangedSubview(button)
    
    let deepPressGestureRecognizer = DeepPressGestureRecognizer(target: self,
        action: "deepPressHandler:",
        threshold: 0.75)
    

    button.addGestureRecognizer(deepPressGestureRecognizer)

The action has the same states as other recognisers too, so when the state is Began, the user's touch's force has passed the threshold:

    func deepPressHandler(value: DeepPressGestureRecognizer)
    {
        if value.state == UIGestureRecognizerState.Began
        {
            print("deep press begin")
        }
        elseif value.state == UIGestureRecognizerState.Ended
        {
            print("deep press ends.")
        }

    }

If that's too much code, I've also created a protocol extension which means you get the deep press recogniser simply by having your class implement DeepPressable:

    class DeepPressableButton: UIButton, DeepPressable
    {

    }

...and then setting the appropriate action in setDeepPressAction():

    let deepPressableButton = DeepPressableButton(type: UIButtonType.System)
    deepPressableButton.setDeepPressAction(self, action: "deepPressHandler:")

Sadly, there's no public API to Apple's Taptic Engine (however, there are workarounds as Dal Rupnik discusses here). Rather than using private APIs, my code optionally vibrates the  device when a deep press has been recognised.

Deep Press Gesture Recogniser Mechanics

To extend UIGestureRecognizer, you'll need to add a bridging header to import UIKit/UIGestureRecognizerSubclass.h. Once you have that you're free to override touchesBegantouchesMoved and touchesEnded. In DeepPressGestureRecognizer, the first of these two methods call handleTouch() which checks either:

  • If a deep press hasn't been recognised but the current force is above a normalised threshold, then treat that touch event as the beginning of the deep touch gesture.
  • If a deep press has been recognised and the touch force has dropped below the threshold, treat that touch event as the end of the gesture.

The code for handleTouch() is: 

    privatefunc handleTouch(touch: UITouch)
    {
        guardlet view = viewwhere touch.force != 0&& touch.maximumPossibleForce != 0else
        {
            return
        }

        if !deepPressed&& (touch.force / touch.maximumPossibleForce) >= threshold
        {
            view.layer.addSublayer(pulse)
            pulse.pulse(CGRect(origin: CGPointZero, size: view.frame.size))

            state = UIGestureRecognizerState.Began
            
            ifvibrateOnDeepPress
            {
                AudioServicesPlayAlertSound(kSystemSoundID_Vibrate)
            }
            
            deepPressed = true
        }
        elseifdeepPressed&& (touch.force / touch.maximumPossibleForce) < threshold
        {
            state = UIGestureRecognizerState.Ended
            
            deepPressed = false
        }

    }

In touchesEnded  if a deep touch hasn't been recognised (e.g. the user has lightly tapped a button or changed a slider), I set the gesture's state to Failed:

    overridefunc touchesEnded(touches: Set<UITouch>, withEvent event: UIEvent)
    {
        super.touchesEnded(touches, withEvent: event)
        
        state = deepPressed ?
            UIGestureRecognizerState.Ended :
            UIGestureRecognizerState.Failed
        
        deepPressed = false

    }

Visual Feedback

In the absence of access to the iPhone's Taptic Engine, I decided to add a radiating pulse effect to the source component when the gesture is recognised. This is done by adding a CAShapeLayer to the component's CALayer and transitioning from a rectangle path the size of the component to a much larger one (thanks to Jameson Quave for this article that describes that beautifully). 

To do this, first I two CGPath instances for the beginning and end states:

    let startPath = UIBezierPath(roundedRect: frame,
        cornerRadius: 5).CGPath
    let endPath = UIBezierPath(roundedRect: frame.insetBy(dx: -50, dy: -50),

        cornerRadius: 5).CGPath

Then create three basic animations to grow the path, fade it out by reducing the opacity to zero and fattening the stroke:

    let pathAnimation = CABasicAnimation(keyPath: "path")
    pathAnimation.toValue = endPath
    
    let opacityAnimation = CABasicAnimation(keyPath: "opacity")
    opacityAnimation.toValue = 0
    
    let lineWidthAnimation = CABasicAnimation(keyPath: "lineWidth")

    lineWidthAnimation.toValue = 10

Inside a single CATransaction  I give all three animations the same properties for duration, timing function, etc. and set them going. Once the animation is finished, I remove the pulse layer from the source component's layer:

    CATransaction.begin()
    
    CATransaction.setCompletionBlock
    {
        self.removeFromSuperlayer()
    }
    
    for animation in [pathAnimation, opacityAnimation, lineWidthAnimation]
    {
        animation.duration = 0.25
        animation.timingFunction = CAMediaTimingFunction(name: kCAMediaTimingFunctionEaseOut)
        animation.removedOnCompletion = false
        animation.fillMode = kCAFillModeForwards
        
        addAnimation(animation, forKey: animation.keyPath)
    }
    

    CATransaction.commit()

DeepPressable Protocol Extension

I couldn't resist adding a protocol extension to make any class that can add gesture recognisers deep-pressable. The protocol itself has two of my own methods for setting and removing deep press actions:

    func setDeepPressAction(target: AnyObject, action: Selector)
    func removeDeepPressAction()

These are given default behaviour in the extension:

    func setDeepPressAction(target: AnyObject, action: Selector)
    {
        let deepPressGestureRecognizer = DeepPressGestureRecognizer(target: target, action: action, threshold: 0.75)
        
        self.addGestureRecognizer(deepPressGestureRecognizer)
    }
    
    func removeDeepPressAction()
    {
        guardlet gestureRecognizers = gestureRecognizerselse
        {
            return
        }
        
        for recogniser in gestureRecognizers where recogniser isDeepPressGestureRecognizer
        {
            removeGestureRecognizer(recogniser)
        }

    }

In Conclusion

Without the access to the Taptic Engine, this may not be an ideal interaction experience, however the visual feedback may help mitigate that. However, hopefully this post illustrates how easy it is to integrate 3D Touch information into a custom gesture recogniser. You may want to use this example to create a continuous force gesture recogniser, for example in a drawing application. 

As always, the source code for this project is available in my GitHub repository here.  Enjoy!


ForceSketch: A 3D Touch Drawing App using CIImageAccumulator

$
0
0

Following on from my recent posts on 3D Touch and touch coalescing, combining the two things together in a simple drawing application seemed like an obvious next step. This also gives me the chance to tinker with CIImageAccumulator which was newly introduced in iOS 9.

My little demo app, ForceSketch, allows the user to draw on their iPhone 6 screen. Both the line weight and the line colour are linked to the touch pressure. Much like my ChromaTouch demo, the pressure controls the hue, so the very lightest touch is red, turning to green at a third of maximum pressure, to blue at two thirds and back to red at maximum pressure. 

Once the user lifts their finger, two Core Image filters, CIColorControls and CIGaussianBlur kick in and fade the drawing out.

Drawing Mechanics of ForceSketch

The drawing code is all called from my view controller's touchesMoved method. It's in here that I create a UIImage instance based on the coalesced touches and composite that image over  the existing image accumulator. In a production application, I'd probably do the image filtering in a background thread to improve the performance of the user interface but, for this demo, I think this approach is OK.

The opening guard statement ensures I have non-optional constants for the most important items:


    guardlet touch = touches.first,
        event = event,
        coalescedTouches = event.coalescedTouchesForTouch(touch) else
    {
        return
    }

The next step is to prepare for creating the image object. To do this, I need to begin an image context and create a reference to the current context:


    UIGraphicsBeginImageContext(view.frame.size)

    let cgContext = UIGraphicsGetCurrentContext()

To ensure I get maximum fidelity of the user's gesture, I loop over the coalesced touches - this gives me all the intermediate touches that may have happened between invocations of touchesMoved().


    for coalescedTouch in coalescedTouches {

Using the force property of each touch, I create constants for the line segments colour and weight. To ensure users of non-3D Touch devices call still use the app, I check forceTouchCapability and give those users a fixed weight and colour:

    let lineWidth = (traitCollection.forceTouchCapability == UIForceTouchCapability.Available) ?
        (coalescedTouch.force / coalescedTouch.maximumPossibleForce) * 20 :
        10
    
    let lineColor = (traitCollection.forceTouchCapability == UIForceTouchCapability.Available) ?
        UIColor(hue: coalescedTouch.force / coalescedTouch.maximumPossibleForce, saturation: 1, brightness: 1, alpha: 1).CGColor :

        UIColor.grayColor().CGColor

With these constants I can set the line width and stroke colour in the graphics context:

    CGContextSetLineWidth(cgContext, lineWidth)
    CGContextSetStrokeColorWithColor(cgContext, lineColor)

...and I'm now ready to define the beginning and end of my line segment for this coalesced touch:

    CGContextMoveToPoint(cgContext,
        previousTouchLocation!.x,
        previousTouchLocation!.y)

    CGContextAddLineToPoint(cgContext,
        coalescedTouch.locationInView(view).x,

        coalescedTouch.locationInView(view).y)

The final steps inside the coalesced touches loop is to stroke the path and update previousTouchLocation:

    CGContextStrokePath(cgContext)
    

    previousTouchLocation = coalescedTouch.locationInView(view)

Once all of the strokes have been added to the graphics context, it's one line of code to create a UIImage instance and then end the context:

    let drawnImage = UIGraphicsGetImageFromCurrentImageContext()


    UIGraphicsEndImageContext()

Displaying the Drawn Lines

To display the newly drawn lines held in drawnImage, I use a CISourceOverCompositing filter with drawnImage as the foreground image and the image accumulator's current image as the background: 

    compositeFilter.setValue(CIImage(image: drawnImage),
        forKey: kCIInputImageKey)
    compositeFilter.setValue(imageAccumulator.image(),
        forKey: kCIInputBackgroundImageKey)

Then take the output of the source over compositor, pass that back into the accumulator and populate my UIImageView with the accumulator's image:

    imageAccumulator.setImage(compositeFilter.valueForKey(kCIOutputImageKey) as! CIImage)
    

    imageView.image = UIImage(CIImage: imageAccumulator.image())

Blurry Fade Out

Once the user lifts their finger, I do a "blurry fade out" of the drawn image. This effect uses two Core Image filters which are defined as constants: 

    let hsb = CIFilter(name: "CIColorControls",
        withInputParameters: [kCIInputBrightnessKey: 0.05])!
    let gaussianBlur = CIFilter(name: "CIGaussianBlur",
        withInputParameters: [kCIInputRadiusKey: 1])!

The first part of the effect is to use a CADisplayLink which will invoke step() with each screen refresh:

    let displayLink = CADisplayLink(target: self, selector: Selector("step"))
    displayLink.addToRunLoop(NSRunLoop.mainRunLoop(), forMode: NSDefaultRunLoopMode)

I rely on previousTouchLocation being nil to infer the user has finished their touch. If that's the case, I simply pass the accumulator's current image into the HSB / colour control filter, pass that filter's output into the Gaussian Blur and finally the blur's output back into the accumulator:

    hsb.setValue(imageAccumulator.image(), forKey: kCIInputImageKey)
    gaussianBlur.setValue(hsb.valueForKey(kCIOutputImageKey) as! CIImage, forKey: kCIInputImageKey)
    
    imageAccumulator.setImage(gaussianBlur.valueForKey(kCIOutputImageKey) as! CIImage)
    

    imageView.image = UIImage(CIImage: imageAccumulator.image())

Source Code

As always, the source code for this project is available in my GitHub repository here. Enjoy!

Globular: Colourful Metaballs Controlled by 3D Touch

$
0
0


I've seen a few articles this week about a beautiful looking app called Pause. One of Pause's features is the ability to move a fluid-like blob around the screen which obviously got me thinking, "how could I create something similar in Swift". The result is another little experiment, Globular, which allows a user to move metaballs around the screen by touch where the touch location acts as a radial gravity source with its strength determined by the force of that touch.

There are a few steps in creating this effect: a SpriteKit based "skeleton" for overall liquid mass followed by a Core Image post processing step to render the smooth metaball visuals.

Creating the SpriteKit "Skeleton" 

The structure of the liquid mass is formed from 150 individual circles of different colours. Each circle is actually a SKShapeNode with a radial gravity field that attracts it to every other circle.

Creating this is pretty simple, my main view controller is a standard UIViewController and I add to its view a SKView. The view needs an SKScene to present:

    let skView = SKView()
    let scene = SKScene()

    skView.presentScene(scene)

Inside viewDidLoad(), I create a loop to create each node:

    for i in0 ... 150
    {

        let blob = SKShapeNode(circleOfRadius: 10)

I want each blob to have a random position:

    blob.position = CGPoint(x: CGFloat(drand48()) * view.frame.width,
        y: CGFloat(drand48()) * view.frame.height)

...and to be one of six colours:

    blob.fillColor = [UIColor.redColor(),
        UIColor.greenColor(),
        UIColor.blueColor(),
        UIColor.cyanColor(),
        UIColor.magentaColor(),
        UIColor.yellowColor()][i % 6]
    

    blob.strokeColor = blob.fillColor

Now the blob is instantiated, I can add it to my scene:

    scene.addChild(blob)

Next, I want to make the blob physics enabled. To do this, I create a physics body with the same visual path as the blob and link the pair. To make the blobs bounce of each other, I set their restitution to 1:

    let blobPhysicsBody = SKPhysicsBody(polygonFromPath: blob.path!)
    blobPhysicsBody.restitution = 1

    blob.physicsBody = blobPhysicsBody

Finally, to make every blob attract every other blob, I need to create a radial gravity field with a limited radius and falloff and attach that to the blob:

    let radialGravity = SKFieldNode.radialGravityField()
    radialGravity.strength = 0.015
    radialGravity.falloff = 0.5
    radialGravity.region = SKRegion(radius: 100)
    

    blob.addChild(radialGravity)

The end result is the raw multicoloured circles that form the liquid's scaffold. Each individual circle is attracted to every other and, with the help of an additional drag field, they move serenely and appear to have a surface tension like effect.


Core Image Post Processing

Now the basic physics is in place, I want to convert those discrete circles into a joined metaballs. The basic technique to do this is blur the image and then tweak the tone curve to knock out the mid-tones. Often the latter part of this effect is achieved with a threshold filter, but since Core Image doesn't have one of those, a CIToneCurve does something similar.

The scene is a subclass of SKEffectNode which has a filter property of type CIFilter. However, because my post processing step requires two filters, I need to create my own filter, MetaBallFilter.

This is pretty simple, my new class extends CIFilter and in the outputImage getter, I chain together a CIGaussianBlur and a CIToneCurve:

    overridevar outputImage: CIImage!
    {
        guardlet inputImage = inputImageelse
        {
            returnnil
        }
        
        let blur = CIFilter(name: "CIGaussianBlur")!
        let edges = CIFilter(name: "CIToneCurve")!
        
        blur.setValue(25, forKey: kCIInputRadiusKey)
        blur.setValue(inputImage, forKey: kCIInputImageKey)
        
        edges.setValue(CIVector(x: 0, y: 0), forKey: "inputPoint0")
        edges.setValue(CIVector(x: 0.25, y: 0), forKey: "inputPoint1")
        edges.setValue(CIVector(x: 0.5, y: 0), forKey: "inputPoint2")
        edges.setValue(CIVector(x: 0.75, y: 2), forKey: "inputPoint3")
        edges.setValue(CIVector(x: 1,y: 0), forKey: "inputPoint4")
        
        edges.setValue(blur.outputImage, forKey: kCIInputImageKey)
        
        return edges.outputImage

    }

I can now set an instance of my new filter as the scene's filter and ensure its effects are enabled:

    scene.filter = MetaBallFilter()
    scene.shouldEnableEffects = true

The end result now looks a lot more "liquidy":

Touch Handling

All that's left now is to have the individual blobs react to the user's touch. To do this, I create another "master" radial gravity field:

    let radialGravity = SKFieldNode.radialGravityField()

...and in both touchesBegan and touchesMoved I set the strength and position of that gravity field based on the touch. It's worth remembering that the vertical coordinates in a SpriteKit scene are inverted:

    radialGravity.falloff = 0.5
    radialGravity.region = SKRegion(radius: 200)
    
    radialGravity.strength = (traitCollection.forceTouchCapability == UIForceTouchCapability.Available) ?
        Float(touch.force / touch.maximumPossibleForce) * 6 :
        3
    
    radialGravity.position = CGPoint(x: touch.locationInView(skView).x,

        y: view.frame.height - touch.locationInView(skView).y)

Source Code

All the source code for this project is available in my GitHub repository here. Enjoy!


ForceZoom: Popup Image Detail View using 3D Touch Peek

$
0
0

My experiments with 3D Touch on the iPhone 6s continue with ForceZoom, an extended UIImageView that displays a 1:1 peek detail view of a touched point on a large image.

The demo (above) contains three large images, forest (1600 x 1200), pharmacy (4535 x 1823) and petronas (3264 x 4896). An initial touch on the image displays the preview frame around the touch location and a deep press pops up a square preview of the image at that point at full resolution. The higher the resolution, the smaller the preview frame will be.

Installation & Implementation

ForceZoom consists of two files that need to be copied into a host application project:


To implement a ForceZoom component in an application, instantiate with a default image and view controller and add to a view:

    class ViewController: UIViewController
    {
        var imageView: ForceZoomWidget!
        
        overridefunc viewDidLoad()
        {
            super.viewDidLoad()
            
            imageView = ForceZoomWidget(image: UIImage(named: "forest.jpg")!,
                viewController: self)
            
            view.addSubview(imageView)
        }
    }

Displaying Preview Frame

Since the popup preview will be the largest square that can fit on the screen:

    var peekPreviewSize: CGFloat
    {
        returnmin(UIScreen.mainScreen().bounds.size.width,
            UIScreen.mainScreen().bounds.size.height)
    }

The white preview box, which is a CAShapeLayer, needs to be that size at the same scale as the image has been scaled on the screen. The maths to do this is in the displayPreviewFrame() method which is invoked by touchesBegan:

    let previewFrameSize = peekPreviewSize * imageScale

Where imageScale is simply the component's width or height divided by the image's width or height:

    var imageScale: CGFloat
    {
        returnmin(bounds.size.width / image!.size.width, bounds.size.height / image!.size.height)

    }

Launching the Peek Preview

When previewingContext(viewControllerForLocation) is invoked in response to the user's deep press, ForceZoom needs to pass to the previewing component the normalised position of the touch. This is because I use the pop up image view's layer's contentsRect to position and clip the full resolution image and contentsRect uses normalised image coordinates.

There are a few steps in previewingContext(viewControllerForLocation) to do this. First off, I calculate the size of the preview frame as a normalised value. This will be used as an offset from the touch origin to form the clip rectangle's origin:

    let offset = ((peekPreviewSize * imageScale) / (imageWidth * imageScale)) / 2

Next, I calculate the distance between the edge of the component and the edge of the image it contains:

    let leftBorder = (bounds.width - (imageWidth * imageScale)) / 2

Then, with the location of the touch point and these two new values, I can create the normalised x origin of the clip rectangle:

    let normalisedXPosition = ((location.x - leftBorder) / (imageWidth * imageScale)) - offset

I do the same for y and with those two normalised values create a preview point:

    let topBorder = (bounds.height - (imageHeight * imageScale)) / 2
    let normalisedYPosition = ((location.y - topBorder) / (imageHeight * imageScale)) - offset
  

    let normalisedPreviewPoint = CGPoint(x: normalisedXPosition, y: normalisedYPosition)

...which is passed to my ForceZoomPreview:

    let peek = ForceZoomPreview(normalisedPreviewPoint: normalisedPreviewPoint, image: image!)

The Peek Preview

The previewing component now has very little work to do. It's passed the normalised origin in its constructor (above), so all it needs to do is use those values to set the contentsRect of an image view:

    imageView.layer.contentsRect = CGRect(
        x: max(min(normalisedPreviewPoint.x, 1), 0),
        y: max(min(normalisedPreviewPoint.y, 1), 0),
        width: view.frame.width / image.size.width,

        height: view.frame.height / image.size.height)

Source Code

As always, the full source code for this project is available in my GitHub repository here. Enjoy!


3D ReTouch: An Experimental Retouching App Using 3D Touch

$
0
0


Here's the latest in my series of experiments exploring the possibilities offered by 3D Touch. My 3DReTouch app allows the user to select one of a handful of image adjustments and apply that adjustment locally with an intensity based on the force of their touch. A quick shake of their iPhone removes all their adjustments and lets them start over.

Much like ForceSketch, this app uses CIImageAccumulator and also makes use of Core Image's mask blend to selectively blend a filter over an image using a radial gradient centred on the user's touch.

The Basics

The preset filters are constants of type Filter and, along with an instance of their relevant Core Image filter, they contain details of which of their parameters are dependent on the touch force. For example, the sharpen filter is a Sharpen Luminance filter and its input sharpness varies depending on force:


    Filter(name: "Sharpen", ciFilter: CIFilter(name: "CISharpenLuminance")!,
        variableParameterName: kCIInputSharpnessKey,
        variableParameterDefault: 0,
        variableParameterMultiplier: 0.25)

The array of filters acts as a data provider for a UIPickerView. When the picker view changes, I set currentFilter to the selected item for use later:


    func pickerView(pickerView: UIPickerView, didSelectRow row: Int, inComponent component: Int)
    {
        currentFilter = filters[row]
    }

The image filtering happens in a background thread by picking pending items from a first-in-first-out queue, so I use a CADisplayLink to schedule that task with each frame update. 

Touch Handling

With both the touchesBegan and touchesMoved touch handlers, I want to create a PendingUpdate struct containing the touch's force, position and current filter and add that to my queue. This is done inside applyFilterFromTouches()  and first of all a guard ensures we have a touch and it's in the image boundary:


    guardlet touch = touches.first
        whereimageView.frame.contains(touches.first!.locationInView(imageView)) else
    {
        return
    }

Next, I normalise the touch force or create a default for non-3D Touch devices:

    let normalisedForce = traitCollection.forceTouchCapability == UIForceTouchCapability.Available ?
        touch.force / touch.maximumPossibleForce :

        CGFloat(0.5)

Then using the scale of the image, I can calculate the touch position in the actual image, create my PendingUpdate object and append it to the queue:


    let imageScale = imageViewSide / fullResImageSide
    let location = touch.locationInView(imageView)
        
    let pendingUpdate = PendingUpdate(center: CIVector(x: location.x / imageScale, y: (imageViewSide - location.y) / imageScale),
        radius: 80,
        force: normalisedForce,
        filter: currentFilter)
    
    pendingUpdatesToApply.append(pendingUpdate)

Applying the Filter

My update() function is invoked by the CADisplayLink:


    let displayLink = CADisplayLink(target: self, selector: Selector("update"))
    displayLink.addToRunLoop(NSRunLoop.mainRunLoop(), forMode: NSDefaultRunLoopMode)

Using guard (again!), I ensure there's actually a pending update to process:


    guardpendingUpdatesToApply.count> 0else
    {
        return
    }

...and if there is, I remove it and assign to pendingUpdate:


    let pendingUpdate = pendingUpdatesToApply.removeFirst()

The remainder of the method happens inside dispatch_async and is split into several parts. First of all, I update the position of my radial gradient based on the touch location:


    let gradientFilter = CIFilter(name: "CIGaussianGradient",
        withInputParameters: [
            "inputColor1": CIColor(red: 0, green: 0, blue: 0, alpha: 0),
            "inputColor0": CIColor(red: 1, green: 1, blue: 1, alpha: 1)])!

    self.gradientFilter.setValue(pendingUpdate.center,
        forKey: kCIInputCenterKey)

Then I set the Core Image filter of the pendingUpdate object's parameters. It needs an input image which I take from the image accumulator and it needs its force dependant parameter  (variableParameterName) updating based on the touch's force:


    pendingUpdate.filter.ciFilter.setValue(self.imageAccumulator.image(), forKey: kCIInputImageKey)
    
    pendingUpdate.filter.ciFilter.setValue(
        pendingUpdate.filter.variableParameterDefault + (pendingUpdate.force * pendingUpdate.filter.variableParameterMultiplier),
        forKey: pendingUpdate.filter.variableParameterName)

With these, I can populate my Blend With Mark filter's parameters. It will use the gradient as a mask to overlay the newly filtered image over the existing image from the accumulator only where the user has touched:


So, it needs the base image, the filtered image and the gradient as a mask:

    let blendWithMask = CIFilter(name: "CIBlendWithMask")!


    self.blendWithMask.setValue(self.imageAccumulator.image(), forKey: kCIInputBackgroundImageKey)
    
    self.blendWithMask.setValue(pendingUpdate.filter.ciFilter.valueForKey(kCIOutputImageKey) as! CIImage,
        forKey: kCIInputImageKey)
    
    self.blendWithMask.setValue(self.gradientFilter.valueForKey(kCIOutputImageKey) as! CIImage,
        forKey: kCIInputMaskImageKey)

Finally, I can take the output of that blend, reassign it the the accumulator and create a UIImage to display on screen:


    self.imageAccumulator.setImage(self.blendWithMask.valueForKey(kCIOutputImageKey) as! CIImage)

    let finalImage = UIImage(CIImage: self.blendWithMask.valueForKey(kCIOutputImageKey) as! CIImage)

Updating my image view needs to happen in the main thread to ensure the screen is updated:


    dispatch_async(dispatch_get_main_queue())
    {
        self.imageView.image = finalImage
    }

In Conclusion

As a tech-demo, 3D ReTouch illustrates how Apple's 3D Touch can be used to effectively control the strength of a Core Image filter. However, I suspect the iPhone isn't an ideal device for this - my chubby fingers block out what's happening on screen. The iPad Pro, with its Pencil, would be a far more suitable device. Alternatively, simulating a separate track pad (similar to the deep press on the iOS keyboard) may work better.

As always, the source code for this can be found in my GitHub repository here. Enjoy!

By the way, if you're in London on Monday (October 19, 2015), I'm doing a brief talk on 3D Touch at Swift London - sign up and come along!

3D Touch in Swift: A Retrospective

$
0
0

Following my 3D Touch for Swift Developers talk at Swift London last night, I thought it would be nice to round up all my 3D Touch blog posts into a single retrospective.

3D Touch in Swift: Implementing Peek & Pop


This post discusses implementing peek and pop in a photo browser / picker. The peek displays a nice preview popup from a thumbnail and a swipe displays a preview action to toggle the selected photo's favourite status.

ChromaTouch: a 3D Touch Colour Picker in Swift


ChromaTouch is a little demo application that allows the user to create an HSL (hue, saturation and lightness) colour using 3D touch: horizontal movement controls the hue, vertical controls the saturation and the force of the touch controls the lightness.

DeepPressGestureReognizer - A 3D Touch Custom Gesture Recogniser 


This post discusses sub-classing UIGestureRecognizer to create a custom gesture recogniser to respond to deep presses.

ForceSketch - A 3D Touch Drawing App


ForceSketch is a demo drawing app where the pressure of the user's touch controls not only the line thickness but the colour hue of the stroke.

Globular: Colourful Metaballs Controller by 3D Touch


Globular is a SpriteKit and CoreImage based metaballs demo where the user's touch acts as a radial gravity source, attracting the metaballs. The post discusses not only 3D Touch but a technique to simulate metaballs with a custom CoreImage post processing step.

ForceZoom: Popup Image Detail View using 3D Touch Peek


ForceZoom presents the user with a scaled high-resolution image, it uses a 3D Touch peek to pop up a 1:1 preview of the image at the touch location.

3D ReTouch: An Experimental Retouching App Using 3D Touch


3D ReTouch allows the user to locally apply a selection of CoreImage filters to an image with the intensity of the filter controlled by the touch's pressure.

A First Look at Metal Performance on the iPhone 6s


This post looks at the phenomenal performance of the iPhone 6s running my Metal particle system. The "multiple touch" mode reacts to the pressure of the user's touch.

All the blog posts link to my GitHub repositories for the source code. The slides from my talk are available at SpeakerDeck.

Book Review: Swift Documentation Markup by Erica Sadun

$
0
0

For me, there’s always been a temptation to avoid documenting code for personal projects. My code is, in my opinion, so beautifully self documenting that it doesn’t need an additional narrative. However, and I’m sure I’m not alone here, that lack of documentation can make my “future me” hate my “non-documenting me”.

Erica Sadun’s new book, Swift Documentation Markup, an Illustrated Tour, not only explains the importance of documentation, it also comprehensively details the breadth of Xcode’s markup support. 

Until I read the book, I had no real idea of just how powerful this support was. In a series of clearly written sections, Erica explains how to implement features such as text formatting, category keywords and even embedded images with real world demonstrations, examples of how Apple use them and recommendations on whether they should actually be used.

The ability to add rich content to documentation means that creating code comments now feels more of a creative process and there’s a certain satisfaction to option-clicking your carefully crafted function to see a beautifully formatted comment appear. This in itself is a incentive to start documenting properly.

So, thanks to Erica, expect to see a massive improvement in my own code documentation from now on. 

Best of all, this book is super inexpensive and is probably worth the price for the beautifully illustrated cover alone. Expect to see Erica’s other book cover illustrations on t-shirts at WWDC 2016!

Swift Documentation Markup, an Illustrated Tour is available here.

The Plum-O-Meter: Weighing Plums Using 3D Touch in Swift

$
0
0


Here at FlexMonkey Towers, the ever beautiful Mrs FlexMonkey and I love to spend our Sunday mornings luxuriating in bed drinking Mimosas, listening to The Archers omnibus and eating some lovely plums. Being a generous sort of chap, whenever I pull a pair of plums from the freshly delivered Fortnum & Mason's hamper, I always try to ensure she has the larger of the two. However, this isn't always easy, especially after the third of fourth breakfast cocktail.

3D Touch to the rescue! My latest app, the Plum-O-Meter, has been specifically designed to solve this problem. Simply place two delicious plums on the iPhone's screen and the heavier of the two is highlighted in yellow so you can hand it to your beloved without fear of being thought of as a greedy-guts.

Lay your plums on me

Plum-O-Meter is pretty simple stuff: when its view controller's touchesBegan is called, it  adds a new CircleWithLabel to its view's layer for each touch. CircleWithLabel is a CAShapeLayer which draws a circle and has an additional CATextLayer. This new layer is added to a dictionary with the touch as the key. The force of the touch is used to control the new layer's radius and is displayed in the label:

    var circles = [UITouch: CircleWithLabel]()

    overridefunc touchesBegan(touches: Set<UITouch>, withEvent event: UIEvent?)
    {
        label.hidden = true
        
        for touch in touches
        {
            let circle = CircleWithLabel()
            
            circle.drawAtPoint(touch.locationInView(view),
                force: touch.force / touch.maximumPossibleForce)
            
            circles[touch] = circle
            view.layer.addSublayer(circle)
        }
        
        highlightHeaviest()

    }

When the touches move, that dictionary is used to update the relevant CircleWithLabel for the touch and update its radius and label:

    overridefunc touchesMoved(touches: Set<UITouch>, withEvent event: UIEvent?)
    {
        for touch in touches wherecircles[touch] != nil
        {
            let circle = circles[touch]!
            
            circle.drawAtPoint(touch.locationInView(view),
                force: touch.force / touch.maximumPossibleForce)
        }
        
        highlightHeaviest()

    }

Both of these methods call highlightHeaviest(). This method loops over every touch/layer item in the circles dictionary and sets the isMax property on each based on a version of the dictionary sorted by touch force:

    func highlightHeaviest()
    {
        func getMaxTouch() -> UITouch?
        {
            returncircles.sort({
                (a: (UITouch, CircleWithLabel), b: (UITouch, CircleWithLabel)) -> Boolin
                
                return a.0.force> b.0.force
            }).first?.0
        }
        
        circles.forEach
        {
            $0.1.isMax = $0.0 == getMaxTouch()
        }

    }

isMax sets the layer's fill colour to yellow if true.

When a plum is removed from the screen, its CircleWithLabel layer is removed and the relevant entry removed from the circles dictionary. Because the heaviest needs to be recqlucated, highlightHeaviest is also invoked:

    overridefunc touchesEnded(touches: Set<UITouch>, withEvent event: UIEvent?)
    {
        for touch in touches wherecircles[touch] != nil
        {
            let circle = circles[touch]!
            
            circles.removeValueForKey(touch)
            circle.removeFromSuperlayer()
        }
        
        highlightHeaviest()

    }

In Conclusion

The value displayed is actually the normalised force as a percentage. It's interesting to see that it changes depending on other forces acting upon the screen which to me indicates that the 6s isn't going to replace your high precision electronic scales. What this demo does show is that the 6s can handle multiple touch points each with a decent value for their relative forces.

I did originally build this app for grapes, but they're too light to activate the 3D Touch.

Of course, for such an important piece of software, I've made the source code available at my GitHub repository here. Enjoy! 

Swift Hierarchical Selector Component based on UIPickerView & UICollectionView

$
0
0

After all the excitement of globular metaballs, pressure sensitive drawing and weighing plums using 3D Touch, it’s back to a slightly more pedestrian subject: a “hierarchical selector” composite component using a UIPickerView to navigate categories and a UICollectionView to select items from those categories.
This component will be part of version 3 of Nodality, my node based image processing application. In Nodality, Core Image filter categories (such as blur) will be the categories and the filters themselves (such as Gaussian Blur) will be the items.
In the demo application, I’m using countries as categories and a handful of their cities as the items. When the taps on a city item, a map centers onto that selected city. I’ve also added a ‘back’ button - just to prove that the new component can be set programatically. 
If the selected item belongs to a category that's not currently displayed, I append a bullet to the category name.
The component has the natty title of FMHierarchicalSelector and is available at my GitHub repository here.

Implementing FMHierarchicalSelector

To use FMHierarchicalSelector in your own project, you’ll need a delegate that implements FMHierarchicalSelectorDelegate. This protocol contains three methods:

Categories

func categoriesForHierarchicalSelector(hierarchicalSelector: FMHierarchicalSelector) -> [FMHierarchicalSelectorCategory]
Returns an array of categories (FMHierarchicalSelectorCategory). Categories are simply strings, so my implementation for the demo simply looks like:
let categories: [FMHierarchicalSelectorCategory] = [
"Australia",
"Canada",
"Switzerland",
"Italy",
"Japan"].sort()

Items

func itemsForHierarchicalSelector(hierarchicalSelector: FMHierarchicalSelector) -> [FMHierarchicalSelectorItem]
Returns a flat array of all of the items. Your item type must implement FMHierarchicalSelectorItem which includes getters and setters for the items name and category. Obviously, you can add whatever additional data you need, so for my project I’ve created an Item struct that also has a coordinate property of type CLLocationCoordinate2D
My itemsForHierarchicalSelector() looks a little like this:
let items: [FMHierarchicalSelectorItem] = [
Item(category: "Australia", name: "Canberra", coordinate: CLLocationCoordinate2D(latitude: -35.3075, longitude: 149.1244)),
Item(category: "Australia", name: "Sydney", coordinate: CLLocationCoordinate2D(latitude: -33.8650, longitude: 151.2094)),

Responding to Change

func itemSelected(hierarchicalSelector: FMHierarchicalSelector, item: FMHierarchicalSelectorItem)

The final function in FMHierarchicalSelectorDelegate is invoked on the delegate when the user selects a new item (city in the case of the demo).
The item argument is of type FMHierarchicalSelectorItem, so in my implementation, I attempt to cast it as an Item and if successful, I can extract the geographic coordinates of the selected city and update my map accordingly:
func itemSelected(hierarchicalSelector: FMHierarchicalSelector, item: FMHierarchicalSelectorItem)
{
guard let item = item as? Item else
{
return
}

let span = MKCoordinateSpanMake(0.5, 0.5)
let region = MKCoordinateRegionMake(item.coordinate, span)

mapView.setRegion(region, animated: false)

history.append(item)
}

In Conclusion

Although the visual design of FMHierarchicalSelector is very much geared to the next version of Nodality, its designed to work with any kind of data and is, therefore, a pretty versatile component to enable users to navigate through large datasets. 
FMHierarchicalSelector is available at my GitHub repository here.
Viewing all 257 articles
Browse latest View live